Pages

Showing posts with label embroidery. Show all posts

Tuesday, July 28, 2020

Some Little Projects

I took time on Sunday morning to make a spool block to decorate my sewing space.  I used the MSQC youtube tutorial to make the block.  It was fun and I would love to make a full quilt with spools.


I also got my embroidery done that I wanted.  It was much easier the fourth time.  These were made with white thread on navy blue fabric.


Monday, December 3, 2018

Lots of Snowmen

    I made the rest of the snowmen ornaments and used up every inch of the white felted wool I bought.   Very little waste on this project and I love these guys.  There are twenty three of them.  I made two banners of ten snowmen each with some bakers twine and they are hanging in my living room.  The other three are standing with my trees in my dining room.  So much fun.


Monday, July 2, 2018

More Snowmen

All the snowmen ornaments are done.  I will not be making any more of these this year.  I still have more white wool, buttons and beads to make more, but they will have to wait.  It took me a whole week to make these ornaments in my spare time.   I will be sharing these with my dear daughter.  These snowmen were so much fun to make, but it's time to move along and get started on other projects.


Sunday, June 24, 2018

Time To Make Christmas Ornaments

   I've been busy making little things here and there.  My spool pin doily project is over now.  I've shipped the last bunch out on Friday.  I'm starting some Christmas decorations.   This little guy is the first of many.  Here is the video tutorial to this cute little snowman.  It includes the template.  Link here.


Friday, March 23, 2018

I've Been Knitting Dishcloths

   That's all I've been doing.  It's been very relaxing.  I have four dishcloths to show for my efforts. 


    While I was knitting these green dishcloths, I decided that I needed some pretty blue yarn to make more.  I ordered four balls of Knitpicks Dishie in the Navy colorway (now that I know blue is my daughter's favorite color which is amazing that I didn't know that before).  So I have to knit up about one and a half balls of the green, jalapeno, colorway then I can start working with the blue yarn. I'm getting about three dishcloths from each ball. 


    I ordered more two cotton yarn cones from Amazon in a beautiful variegated yellow and blue colorway, but it got lost in shipping and I never received it.  Then I had to fight with the Amazon website to find the right place to report my lost package and request a refund.  It is not easy to find the right screen in Amazon to report a lost package and I couldn't even send a complaint about how hard this is to do because there isn't any place to lodge a complaint.  I haven't ordered anything from Amazon since.  I don't think my postman cares very much, so I'm laying off the mail orders for a while.  I'll buy cotton yarn in a local store if I want more.

    Yesterday I was looking at quilting blogs and I found some beautiful applique and embroidery that I wanted to share with you.  Through The Needles Eye.  She made a beautiful robin with a forsythia branch that is just stunning.  Here is the link to her post.   Click Here.  I have beautiful memories of forsythia from my childhood.  We had a large forsythia bush in our backyard and every spring while I was in elementary school, my mother would clip some sprigs off, wrap them in aluminum foil, and make me take them to my teacher.  She would do the same thing with the roses from the single rose bush that bloomed in our yard. 

    I haven't done any sewing on my quilt top.  I did make up about 30 pink and 30 orange hexies to make more flowers, but that was as far as I got.  I have also made headbands from t shirts.  I don't have a picture, but I do have a link to a short YouTube video on how to make a headband from t-shirts.  I bought new t-shirts to make these and they are super cute.  I got two headbands from each t-shirt.   I hand sewed them instead of using my glue gun like the person did in the video.  I don't like glued wearable items.  Here is the link to the video:  Click Here.   Have Fun.


Wednesday, February 7, 2018

Embroidery Hoop Wall Art

   I bought three sizes of embroidery hoops a couple of weeks ago.  I wanted to make some wall art with some cute fabrics I have.   Here are three of the animal prints I found in my stash.


    I will finish the back with a piece of white fabric hand sewn to the fabric sticking out of the hoop.  I did this for another project and it worked really well and it doesn't take that long to do.   I have to get some plain white fabric, I'm all out.

Sunday, June 25, 2017

Hexagon Quilt Update

   I have finished another block in my Grandmother's Flower Garden quilt.  I have two done now.  Only 33 more to make.  ðŸ˜Ž  I have been taking my sweet time with this project.  No rush.  I have plenty of quilts to keep my warm when the weather turns cold.


   I received the yarn for my Hotel of Bees Shawl on Friday and I wound all nine skeins into yarn balls so they are ready to use.  I should take a picture of my yarn.  I also took some time to read through some of the pattern last night.  I don't know when I will start this project, but I want to finish my Christmas hanging dishtowels before I start this.  I still have two dishtowels to embroider.  Once they get the embroidery done I have to make the top part.  I didn't get a chance to finish the embroideries on the last two towels this past weekend because . . . 

   I spent a lot of the weekend buying mulch for my large flower bed in the front of the house.  I have a small car so I can only buy 4 bags of mulch at a time.  I made four trips to the home improvement store buying mulch Friday night and Saturday morning to get enough mulch to cover this space.  I used 15 bags of mulch in this space.  I swear my roses look happier since I put the mulch down. 


Wednesday, June 21, 2017

Christmas Is Coming, Believe It Or Not

    I thought I would get an early start this year.  I hate giving Christmas gifts, I have a hard time deciding what to give anyone.  I do know that my daughter and my brothers like the hanging dish towels that I make, so that's what I will make to give to them.   I will make five of these pretty dish towels and I should have them all finished by next week.

    I bought the fabric and the towels for this project last month.  I bought two huge white tea towels and cut them into quarters.  I hemmed the one cut side on my sewing machine and then I put the towel into the hoop to add the embroidery to it.  I only got one embroidery made tonight but I love it.  I will embroider the rest over the weekend then I can start adding the fabric toppers to each one.

    Here's the embroidery design I'm using on the towels.


     This makes a nice break from hand sewing hexies.  I really miss my sewing machine when I'm doing a hand sewing project.  I love pressing down on the foot pedal of the machine and sewing at full speed.

Friday, May 12, 2017

Embroidery Machine Fun

   I almost forgot to tell about the machine embroidery adventure I had last weekend.  I have a Brother PE770 Embroidery Machine that my daughter gave me as a birthday present in 2014.  It was supposed to be a machine we both would use but it lives at my house so I use it more.  I set it up and use it about 3 or 4 times a year for making hanging dishtowels, embroideries to add to tote bags or to frame, and monogrammed linen napkins, I would love to play with a multi-needle machine someday.
   Back in January I had an idea for dear daughter to make her Father some embroidered toilet paper for Father's Day.  Dear daughter picked the design and I purchased it.  We got together last Saturday to embroider toilet paper.

    I did a sample stitch out of the design on Friday night on a plain piece of white cotton fabric with stabilizer.  It worked great and took me about 40 minutes from set up to final stitch.

     On Saturday we had a few problems and the project took a lot longer than anticipated.  I don't think my machine is built to embroider toilet paper because when we tried to embroider on the toilet paper the machine jammed up and it would eat the toilet paper and the stabilizer.  

     We ended up with three designs stitched out on regular white muslin which dear daughter will wrap around toilet paper rolls.  The three designs took us almost 5 hours including an hour of that time taken to go to Walmart to get the fabric.

       It was a fun project and a real learning experience.  Dear daughter got a chance to really work with the machine up close for the first time since we have had it.

    Here is a picture of the design we stitched out.


Saturday, February 27, 2016

Cutting Out Fabric to Make Lots of Bags and Crocheted Embroidery Hoops

   I'm making a bunch of Two Kates Project bags.  I love this beautiful bag pattern and I thought this would be a great project to use up some of my fabric stash and I need some new project bags for my knitting and crochet projects.  This bag is perfect to store my yarn projects because it doesn't use a zipper  or a drawstring and it's a nice size.  The link to the .pdf pattern is here. 

   Tonight I cut out fabric to make thirteen of these bags.  The picture of the bright green lady bug fabric at the end is a bag that will be given to dear daughter.  She loves lady bugs.  Most of these bags have the same fabric for the lining as the outside but a few of them have different lining fabric because I didn't have enough fabric for both.


   I'll be sewing on these bags for the next few days.

   I finished crocheting the borders on the rest of my 3" embroidery hoops for my Christmas tree project.  I did all of these crocheted borders with embroidery thread.  It was a lot of fun to do.  To finish these hoops I still have to add some embroidered trees.


Thursday, February 25, 2016

The Start of My 2016 Christmas Tree Project

   I made two crazy little Christmas tree decorations to start off this project that I will be working on all year.  These are going to be my substitute for a regular Christmas tree during the holiday season.   I don't put up a regular tree because of my kitties and I miss a Christmas tree, so I decided to make some trees that they can't destroy and put them around the house during the holidays.

    This is the first one I made a a couple of weeks ago.  This idea looked prettier in my mind than it actually does made up, but I like it.  My idea was to crochet a long piece and shape it into a tree and secure it on fabric.  To make the crocheted piece, I used embroidery thread with a 1.7 mm steel hook, crocheted a chain of about 64 stitches, crocheted a round of half double crochet around the chain and then added a picot edge.  I attached it to the fabric, added sequins, and bound it.


   This is the second tree I made.  I crocheted a border around this 3" embroidery hoop using embroidery thread then I added the small embroidery.  I found the border idea here.  I have five more of these embroidery hoops, so I'll be using those up and crocheting different borders in different colors.

     I used a skein and a half of embroidery thread with a 1.7 mm steel hook.  I put the border around the outside hoop so I could add the embroidery.  The designer uses the inside hoop for her borders because she is using them as picture frames and doesn't need the outside hoop.


    The third Christmas tree will be a larger appliqued piece.


Sunday, November 8, 2015

Birthday Gifts

    I finally get to share the birthday gifts I gave my daughter.  She turned 39 years old yesterday and we got to spend some time together yesterday so she could open her gifts.  I bought her a shop vacuum in July that was part of her birthday gift, but I wanted to make her a few things for her new house.  So here are the homemade birthday gifts I gave her yesterday.

    I made her a rag quilt with a sale priced flannel that I found at Hancock Fabrics.  I posted about it  here.  This project took me about 4 days to finish.  She loves the cats on the fabric and the gray matches her new couch.  I bought 9 yards of this flannel fabric.  I cut it up into 108 - 10" squares.  I layered 3 squares together and sewed an X in each 3 layer block.    I sewed 6 blocks in a row and made 6 rows sewing them together so the seam is exposed on one side.   And this crazy fabric was directional so I had to be careful to get the cats all going in the same direction.  Fun.  After I sewed the entire quilt together, I snipped all the exposed seam allowances about 1/2" apart being careful not to snip the actual seams, then I threw the quilt in the washer and dryer to get the seams to ravel and become "raggy".


    The next project I made for her was an embroidery done on the embroidery machine she bought for my birthday last year.  I spent 3 hours getting this sewing machine embroidered because it had so many thread color changes.  It was very time consuming but it turned out pretty good.  I embroidered the picture on a piece of white muslin and framed it with a wooden frame that I painted.  It was really easy to do and the whole thing cost me about $12.00 including the cost of the embroidery design.  She loved this one as well.  Something she can hang on the wall of her craft room.


   And the last homemade gift I made were some linen napkins.  When I was shopping for fabric, I couldn't decided which color I liked more so I bought 1 yard of each and made four napkins from each yard.  I cut the fabric into fat quarters, hemmed them and then embroidered them with her last name initial on them.  The white is a linen blend and it was easier to work with than the blue or the brown fabric which were 100% linen.  If I were to make more linen napkins, I would definitely use a linen blend.  She loves her new napkins for her new house.  The fabric for these napkins was about $35.00.


      I didn't make the next gift.  I wanted her to have a wind chime for her yard so I found a reasonably priced wind chime on etsy and it's super cute made with recycled kitchen items.  We took the time to hang this in the tree in her front yard yesterday.


    I also gave her a home made sour cream pound cake and then we spent the afternoon at the North Florida Fair looking at the farm animals, eating junk food and enjoying the warm November weather.


Saturday, May 2, 2015

Bead/Sewing Cat Picture Project


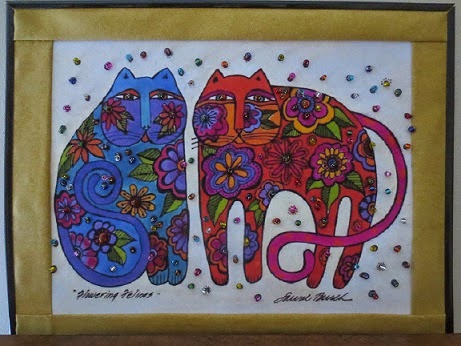
  I found this pretty picture on the internet.  This is an art drawing by Laurel Burch.  It's called "Flowering Felines."

   Ms. Burch drew colorful pictures of cats, dogs, horses, sea life and plant life.  Unfortunately, Ms. Burch passed away several years ago.  I found her work after I bought my bengal kittens, Taffy Morgana and Merlin almost 10 years ago.  I was all into cat everything and I knew I had to have some Laurel Burch cat stuff.  I bought a few pieces of jewelry, two pair of socks and three bags, but I never had anything by her to hang on my wall.  This picture is going on my wall with a few enhancements.

   Here are the two pair of enamel earrings that I cherish.


   Back to the picture.  After looking at Flowering Felines for a while I decided that beads were the way to go.  I wanted this picture to shimmer when the light hit it.  I printed the picture onto a fabric sheet made for my ink jet printer.  I used Avery 3384, 8 1/2" x 11" printable fabric sheets.  It worked very well in my HP ink jet printer and it printed right the first time.  When you use this type of product you have to make sure you put the fabric sheet in paper tray right so the picture prints on the fabric side.  The other side is glossy and has the adhesive to make the sheet an iron on.  I did a quick print test to make sure I put the fabric sheet in the paper tray the right way.  I mark a piece of paper indicating which way the paper was set in the paper tray so after I print I can figure out which way my fabric sheet should go in.  It only takes a minute to do and is worth the trouble to get the picture printed right on the fabric sheet.

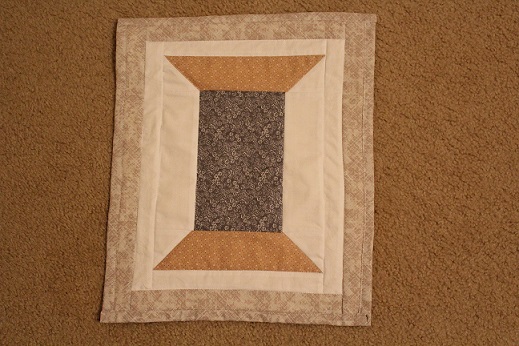
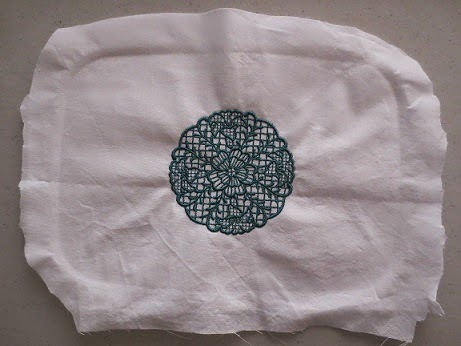
    After printing my picture, I ironed it to a piece of muslin to stabilize it before I started adding beads.   The piece was stiff and I could not put it in an embroidery hoop.  I also had a hard time finding the exact spots I wanted to put my beads from the back side of the work, but I used a flashlight to pin point the exact spot I wanted to put my needle in from the back and that helped a lot.

     I did all the beads in the cats first, then I added the orange borders and finished beading the dots outside of the cats.  By the way, I thought sewing the orange borders on through the fabric sheet would leave an adhesive residue on my sewing machine needle, but it did not and it was really easy to sew through.  That was a nice surprise.  I used gold metallic embroidery thread to put the beads on and it was a real pain to work with.  I had a hard time separating my threads and keeping them from shredding while I sewed, but I wanted shimmer and I thought cotton embroidery thread would dull the shine of the beads.  I used multi colored 6/0 glass beads by Craft Designer that I found at Joann's Fabrics.

   The beading was done and it was time to frame this.  I bought the frame at Walmart for $5.00.  It was a 10" x 13" floating frame and the black part of the frame is actually clips that secure the piece to the glass.  Super easy.


Up close of the  beads.


   Cost for my picture was about $15.75.

   Done.

Tuesday, February 24, 2015

Making Tote Bags


       I have Crafty Gemini's Must Have Tote Bag pattern.  It's a great pattern.  You take one yard of decorator cotton and about an hour and a half and you have a super gift for a co-worker.  This time I did something a little different with my gift tote bag, I dressed it up with a pretty embroidery on the pocket.  The embroidery was done with my embroidery machine (I bought the pattern from Embroidery Library) and it was super simple to add to the pocket.  When I learn how to embroider monograms I can start using monograms on the tote bags.

    These tote bags are a great size and are very durable.  I have about three that I made about three years ago and they are still going strong.  The side and bottom seams are finished with french seams and the edges of the pocket are enclosed as well as the edges of the straps so there is no fraying anywhere on your tote bag.


    My gift tote bag for a birthday.


I made an extra one to have on hand.


   I'm currently working on my barn quilt.  I've come to the conclusion that I am not a painter.  I hate waiting for paint to dry.  I should have the varnish on it by Sunday.


Sunday, February 15, 2015

Time Spent with My Embroidery Machine

      Wow, I just spent 6 hours with my embroidery machine learning, learning, and learning some more.  In that time I made two items that I deem good enough to give away.  I made this super cute dish towel for someone I love.  I can't say who, but they will adore it.  My family loves St. Patrick's Day.  My mother was 100% Irish and St. Patrick's Day was very special to her.  By the way, I ruined two other dish towels getting this one done.  The other two dish towels each have one good stitched out design on them and I will cut them up and sew them together for me.

     I learned a lot about my embroidery machine today.  I learned how to change the needle (I broke two), I learned how not to break the needle, and I learned how to insert the bobbin correctly.  I also learned how to go back and restitch when the thread breaks and I learned how to change colors on a design in my design software on my computer.  So all that time was not wasted.


Here's another design I stitched out today.  It was almost too easy except for the one time the 
thread broke (I have no idea why).  This beautiful Napoleanic bee in a laurel wreath will be going on tote bag I'm making for a birthday present for one of my bosses.  


Sunday, January 25, 2015

I Can Trace.

      I have had the muslin for this project for a couple of weeks and I've had the pattern even longer, but I couldn't make myself start this project because I was afraid I was going to screw up the pattern tracing.  I've never traced a pattern before, I can't draw, and I don't own a light box.  I do have a lovely sliding glass door in my dining room that gets beautiful morning light and I knew I could use this as a light box, but I was procrastinating.

   This morning I made myself get my fabric ironed, I opened my new brown pigma pen, got my painters tape out, pulled out the embroidery pattern and the instructions.  I used the painters tape to secure the pattern and the fabric to the window.  There were three pattern pages.  I taped the first page up, and didn't tape up the second page until I finished tracing the first, then I lined up the second pattern page with the bottom of the first page, taped it to the window and traced it.  The third page was the easiest.

   The morning light at 10:30 a.m. was perfect.  It took me about an hour to trace this pattern and it came out really well.  I've already selected the colors from my embroidery floss stash and I'm ready to start stitching.

    Here is my sliding glass door light box.  This is a picture of the tracing finished.


   The pattern is "Never Underestimate The Power Of A Woman With A Sewing Machine"  Here is a link to the pattern.

Thursday, January 15, 2015

Time To Buy A Bathmat

     I'm going to buy a bathmat from Walmart today.  I will not be finishing the crochet bathmat I planned to make with the the 1" strips of fabric I sewed together to make fabric yarn.  I did a test crochet last night with the ball of yarn I made the other night and I hate it.  I just wanted to let you know that I will not be working on this project anymore and you won't see a picture of the little bit I crocheted last night.  It is completely U G L Y.   I wasted about a week on this sewing/crochet fail and I'm moving on to the items listed below.


1.  Recover the cardinal pillow I made last year with red plaid fabric I bought a couple of weeks ago.

2.  Cut the squares for my Civil War Buckshot pincushion  and order the emery sand.

3.  Make the 4 pillow cases with the yardage of Tanya Whelan fabric I purchased last year.

4.  Iron the muslin and trace the pattern for the hand embroidery, Never Underestimate A Woman
     With A Sewing Machine.   Then pick the colors of floss for the embroidery.

5.  Organize the box holding more projects, fabrics and supplies.

6.  Start the pink fluffy granny square afghan for my bedroom.


Sunday, January 11, 2015

Embroidery Machine Test Success.

   This morning I completed a successful test of my embroidery machine using my newly acquired supplies of stabilizer and thread.  I did a couple of tests of a small one color heart then I watched the machine stitch out this 25 minute one color design that is pre-loaded in the machine.  I was interested to see if I would run out of bobbin thread on the large design, but I still had lots of bobbins thread left.  Next I have to get my software set up on my computer.  On Friday I did some browsing on the Embroidery Library site and purchased one design and a alphabet design pack which has letters with pretty wreaths around them.   I really enjoyed shopping at the Embroidery Library site and I put a few items in my wish list for later.

   Picture of the machine in action.


   This is the finished embroidery.  It was interesting to see the machine stitched the design in  layers.


Thursday, January 8, 2015

Look! They Match!

       My big and little ironing board covers match now.  I covered the little ironing board last month and on Monday night I made the new cover for the big ironing board.  It took me a couple of hours to make it while I watched TV.  It's nice to have matching covers on my ironing boards.  I'm thinking about making matching machine covers for all the sewing machines, but that will have to wait for a little while.


  I've added a couple of quickie projects to my list.  I'm going to make myself a bathmat (pieced quilting cotton quilted to an old towel) and a dishmat, same idea as the bathmat but for the kitchen counter as a place to put wet just washed dishes when my dish drainer is overflowing.

   I also just ordered some yarn to make a big fluffy pink crocheted afghan for my bedroom.  I'm going to use a size N/P crochet hook and a double strand of Red Heart Super Saver making a large granny square.  These afghans work up really quick and are super warm.  I make these a lot when I want to get a big fluffy blanket done in a hurry.

      Here's a picture of the one I made with my scraps last year.


Here's a picture of the one I made for my daughter in a teal color.  This one has a crab stitch border on the edge.  


    I'll be playing with my embroidery machine this weekend.  I have plenty of tear away stabilizer, thread, and bobbins.

Sunday, January 4, 2015

Pretty In Pink Quilt Finished


 I just finished hand sewing the binding on the back of the quilt and I'm calling it done.  It's not perfect, none of my projects are, but it's perfect for me.  This is the front and a close up of the back showing the blocks I pieced into the center of it.  My Bernina walking foot worked great. The stitching was easy and the stitches were very nice.


   Now on to other projects.  I have to do a few small ones before I start my Christmas quilt.  I have to make my ironing board cover, sewing machine covers, pillowcases for my bed, and the harness for the dog in blue.  I have more but I can't remember them all right now.  And I want to play with the embroidery machine next weekend.  Plenty of sewing and crafts to keep me busy in the new year.

    See you soon.