Pages

Showing posts with label wool. Show all posts

Sunday, March 3, 2019

Fun Cow Creamers Transformed Into Pin Cushions

   I have a blue delft pottery cow creamer that I bought from eBay several years ago that I made into a pin cushion.  I felted a flat disk of wool yarn and inserted that into the body of the creamer.  It works well.  I even named her Blue Bell. 

    I was checking out eBay last week and found a souvenir Hershey cow creamer that I had to have.  She is smaller than Blue Bell but she is awesome.  She has a red ribbon around her neck  with a faux bell on it.  I plan to add a pink tongue to her mouth, like Blue Bell and also insert a disk of brown felted wool yarn in her body to finish the pin cushion.  Her name will be Coco.

   I wish I could have a whole herd of these.  There were some beautiful Polish pottery cow creamers available as well.  Maybe in a few years I'll add another one.

  Pictures.


Monday, December 3, 2018

Lots of Snowmen

    I made the rest of the snowmen ornaments and used up every inch of the white felted wool I bought.   Very little waste on this project and I love these guys.  There are twenty three of them.  I made two banners of ten snowmen each with some bakers twine and they are hanging in my living room.  The other three are standing with my trees in my dining room.  So much fun.


Friday, November 9, 2018

Secret Birthday Sewing and Gifts Revealed.

   I made my dear daughter several things for her birthday.  They included three shopping bags.

   Two made with this fun pineapple fabric with a fun lining on each outside pocket.


    One made with this fun blue and white plaid and I gave the outside pocket a wonky look with a fun lining.


    I also made her a 16" pillow cover with snowflake fabric in a star pattern.

     front


     back


    Lastly, I made her a 16" pillow cover with the fun snowfolk on it.


    I bought her some needle nannies from etsy sellers, some cross stitch needles, a set of steak knives, a book about aprons called "The Apron Book" by EllynAnne Geisel, and I also made her six white wool dryer balls.

    We went out for dinner the day of her birthday and had a lovely meal at a local owned Italian restaurant.

Monday, November 5, 2018

How I Make My Wool Dryer Balls

   I bought three skeins of Knit Picks Wool of the Andes bare bulky yarn to make six wool dryer balls.  I wound two dryer balls from each skein.  After winding the balls I secure them in knee high stockings to felt the balls.  I put three balls in each knee high.  I put one wool ball in and I tie a knot in the knee high, then I put the second wool ball in and tie a knot, then I put the third ball in and tie a knot.  I took a picture of this step but my camera wasn't charged and it didn't take the picture.

    Once the balls are in the knee high, I soak them to get them good and wet.  I wash them in hot water with a towel and detergent.  Once they are washed, I put them in a hot dryer with the towel.  The first go in the dryer didn't felt the balls right away, so I wet the balls two more times with just plain water and wet the towel and ran them in a hot dryer.  After the third dryer cycle the balls had felted very well.  I cut the knee highs off and put the balls in a bowl to let them completely dry.  I made these for my daughter for her birthday.


Monday, July 2, 2018

More Snowmen

All the snowmen ornaments are done.  I will not be making any more of these this year.  I still have more white wool, buttons and beads to make more, but they will have to wait.  It took me a whole week to make these ornaments in my spare time.   I will be sharing these with my dear daughter.  These snowmen were so much fun to make, but it's time to move along and get started on other projects.


Friday, March 23, 2018

I've Been Knitting Dishcloths

   That's all I've been doing.  It's been very relaxing.  I have four dishcloths to show for my efforts. 


    While I was knitting these green dishcloths, I decided that I needed some pretty blue yarn to make more.  I ordered four balls of Knitpicks Dishie in the Navy colorway (now that I know blue is my daughter's favorite color which is amazing that I didn't know that before).  So I have to knit up about one and a half balls of the green, jalapeno, colorway then I can start working with the blue yarn. I'm getting about three dishcloths from each ball. 


    I ordered more two cotton yarn cones from Amazon in a beautiful variegated yellow and blue colorway, but it got lost in shipping and I never received it.  Then I had to fight with the Amazon website to find the right place to report my lost package and request a refund.  It is not easy to find the right screen in Amazon to report a lost package and I couldn't even send a complaint about how hard this is to do because there isn't any place to lodge a complaint.  I haven't ordered anything from Amazon since.  I don't think my postman cares very much, so I'm laying off the mail orders for a while.  I'll buy cotton yarn in a local store if I want more.

    Yesterday I was looking at quilting blogs and I found some beautiful applique and embroidery that I wanted to share with you.  Through The Needles Eye.  She made a beautiful robin with a forsythia branch that is just stunning.  Here is the link to her post.   Click Here.  I have beautiful memories of forsythia from my childhood.  We had a large forsythia bush in our backyard and every spring while I was in elementary school, my mother would clip some sprigs off, wrap them in aluminum foil, and make me take them to my teacher.  She would do the same thing with the roses from the single rose bush that bloomed in our yard. 

    I haven't done any sewing on my quilt top.  I did make up about 30 pink and 30 orange hexies to make more flowers, but that was as far as I got.  I have also made headbands from t shirts.  I don't have a picture, but I do have a link to a short YouTube video on how to make a headband from t-shirts.  I bought new t-shirts to make these and they are super cute.  I got two headbands from each t-shirt.   I hand sewed them instead of using my glue gun like the person did in the video.  I don't like glued wearable items.  Here is the link to the video:  Click Here.   Have Fun.


Thursday, January 11, 2018

Hearts Galore

   I am officially finished making Valentine's Day crocheted hearts.  I pulled out my yarn stash and found some other colors other than the bright pink to make these hearts.  I even found some leftover red wool yarn.. 

   Hearts!!!


Tuesday, March 15, 2016

Miss Marple Scarf in Acrylic

    I had to remake the Miss Marple Scarf in a yarn I could wear around my neck that wouldn't itch.  I knit this pattern about a week ago (blog post here) in some wool yarn I had in my stash and although the colors in the yarn were quite pretty, the scarf is extremely scratchy.  I knew when I tried it on after it was finished I wouldn't wear it very much.   

    But I really love the design of the scarf and the name of it.  It's super cute and I knew I wanted to re-knit this fun pattern in a soft acrylic yarn that wouldn't itch.  I used a skein of Caron Simply Soft in the Bone colorway that I found in Walmart for about $3.65 including tax.


Wednesday, March 9, 2016

My Miss Marple Scarf

    I finished knitting this last night.  It's a free pattern on Ravelry so I can't link it here, but you can join Ravelry for free and get it.  The pattern was pretty easy, but not written very clearly.  I did manage to figure out the vague parts.

    I made this with some stash yarn that I had.  It's Patons Classic Wool in the Wedgewood colorway. I love the striping on it.  I will definitely knit this scarf again.  I think I would like this in several solid colors.


    This morning I found this super easy pattern for crocheted bows to make hair clips and I crocheted these four bows in about 20 minutes.  It's so easy.  The pattern link is here.  These will make cute pins as well.  They are about two inches wide and an inch tall.


Wednesday, November 11, 2015

Emery Sand Reclamation

   I reclaimed the emery sand from a pin cushion I made a couple of years ago.  The cotton cover on that pin cushion was looking very old with all the pin holes in it.  So I took it apart and saved all the emery that was in it and made a new cover.  The last time I bought emery sand I bought it at this etsy shop, My Sweet Accent, link here.  I see she also sells pin cushions, but I prefer to make my own.  I have also purchased emery sand from Nakpunar on Amazon, as well.

   I've never used the walnut shells or any of the other nut shells that are sold for pin cushion stuffing because I have not heard good things about them.  One person told me that her pins were sticky with some type of residue from the pin cushion she made with the nut shells.  You also have to be careful because lots of people have allergies to nuts.

    When I make emery sand pin cushions, the emery is placed in its own little pouch so it's contained and easy to reuse.  I took the emery from my old pin cushion and added some that I had leftover in my stash.  It was originally shipped in a zip loc bag, so I just poured the emery from the old pin cushion in with the leftover to hold it until I was ready for it.  I was able to make a new pin cushion with most of that emery.  I wanted to make two pin cushions, but I didn't have enough, so one will have to do.  I made my pin cushion in a simple rectangle shape.

      First I made a cotton pouch to put the emery in.  The pouch was made from a piece of cotton.  I cut a two pieces of cotton 4" x 6" for the pouch.  I sewed up three side of the pouch using a 1.8 stitch length to make it secure using a 1/4" seam allowance.  After I made the pouch, I filled it with emery, very carefully.  I use a funnel and a spoon with the pouch propped up in a small mixing bowl to catch any loose emery, then I hand sewed the pouch closed using very small stitches.

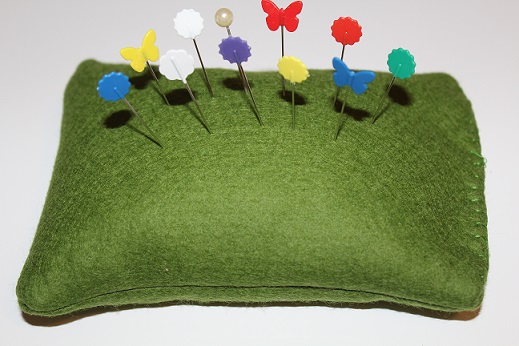
     I made the cover with some wool felt I had in my stash and I cut it just about a quarter of an inch bigger than the original cotton pouch so the emery pouch would fit .  I sewed up three sides of the cover on the machines with the 1.8 stitch length, using a scant 1/4" seam allowance, (when sewing felt you can use a very tiny seam allowance because the material doesn't fray) turned it right side out, slipped the pouch inside and hand sewed the open end.

   It's done.  A new pin cushion with sharpening emery sand for my straight pins.


Red Wool Pin Cushions

     I do not have any red sewing accessories on the table that I keep my active sewing machine on.  It is time to add some red color to my sewing area.  I made a couple of felted wool pin cushions for myself with some wool yarn I purchased just for this project.  I love making these little wool pin cushions.  They are so much fun to make, so simple and so useful.

     This is a short written tutorial on how I made them.  I use 100% wool yarn.  I bought two skeins of KnitPicks.com's Wool of the Andes worsted yarn a couple of weeks ago.  One skein in red and another in cranberry.  This yarn is lovely to knit with.  I've made a few scarves with it, but it's really great for felting.  The bulky variety of Wool of the Andes is also fun to work with.  I was able to make two pin cushions from each of the skeins I bought.

      I wind the yarn into a flat ball.  I couldn't tell how much yarn I had used each time, so I just guessed when I thought I had used half of the skein for the first ball of each skein.  I thread the end of the yarn into a long steel needle and weave into the center of the ball several time to make a little dimple and then I weave the end in the ball of yarn to secure it.  To keep this all together while I'm felting it, I place the balls in a knee high stocking secured with a knot very close to the ball.  I can fit four or five of these small wool balls into a knee high.  You can also use a sock to the do this, but I prefer to use a knee high because I can see through the stocking and I can see if the wool is felted enough.  I wet the knee high and the wool balls thoroughly in the sink with hot water, you can also put them in with a load of wash.  Soap is supposed to help with the felting process, but I usually just rely on water and the heat from the dryer.  Then I dry them in the dryer with a couple of wet bath towels or a load of wash.  The heat and the friction help the wool to felt.  I usually run them through the dryer several times until I like the way they have felted.  In this project, the red wool felted much better than the cranberry wool.  Interesting.


Friday, April 10, 2015

Felted Wool Pin Cushions


   I made more wool pin cushions last year and I'm just getting around to giving them away on the Quilting Board.  These pin cushions are a big hit with my quilting buddies.  I posted the give away last night about 8:00 p.m. and these pin cushions are already spoken for.

    I got the idea to make these from making wool dryer balls.  The only difference is I try to wind the pin cushions flatter so they will sit and not roll around.   Here's how I make them.  I wind up 100% wool yarn (I used Wool of the Andes bulky yarn from KnitPicks.com for these) into a ball then I start to tighten the yarn and I squeeze the ball flat while I'm winding and I continue to wind until I get a ball about as big as a tennis ball or so.  I secure the end of the yarn by threading a big needle and running it through the yarn ball a few of times.  The yarn ball is put inside an old knee high stocking or you can use a tube sock (you can get about 6 balls of yarn in one knee high).  I like using a knee high because I can see how much the yarn is felting.  Make sure you knot the knee high or sock next to the yarn ball to keep it secure, this keeps it from unraveling.  I wet the whole thing or you can also put it in a load of wash, the soap is supposed to help with the felting process and I pop it into the dryer for several cycles.  It takes about 2 hours to get the yarn to felt.  The balls won't be anywhere near dry so I let them dry out for a couple of days then I remove the knee high.  The wool yarn grabs the fabric of the knee high and you have to peel it off the yarn ball, but it does come off.  Then you have a fun wool pin cushion.


Wednesday, December 17, 2014

Pins, Pins, Pins, and Of Course, Pincushions.

     I love, love, love pincushions and pins.  One of the best things about sewing are all the fun notions I get to have.  Pincushions and pins are so simple and I am one of the sewists that can't sew without them.  I also love that they can be super decorative.  I buy them, I make them, I can't get enough of my pins and pincushions.

   When I make a pincushion I try to fill it with emery sand (not always possible) because it's so good for sharpening my pins.  I buy emery sand on Amazon or etsy.com so it's super easy to get and one pound of emery sand goes a long way.  You only need a little emery pincushions to help sharpen those pins.


       These teacup pincushions (I used the idea from a blog called MrsMMakes, link here) are filled with polyfil because it was the best material to get the nice plump pin cushion top on the cup.  I did cover them with wool (another good material to use for pins).  The pink cup has wool felt I bought in squares from an etsy seller.  The blue pincushion and the green pincushion are covered with felted wool I knit myself.  To make the blue and green covers I just knit a quick square of stockinette stitch from my wool yarn stash, felted it, filled it with polyfil, sewed it up and glued it into the cup.  The teacup is then glued to the saucer.  This is a super quick and fun project and they would also make a great gift for a fellow sewist.  The hardest thing about making these pincushions was finding a not too expensive pretty teacup and saucer to use.  I always go to ebay or etsy for my teacups and I try to buy them out of season like early in the year before Mother's Day and well before Christmas because the prices go up for those holidays.


       I have no idea what is inside these tomato pincushions I bought, I think it is sawdust, but I don't think my sewing room would be complete without a tomato pin cushion, or two or three.  I found the following information on wikipedia regarding these cuties:  "According to folklore, placing a tomato on the mantel of a new house guaranteed prosperity and repelled evil spirits. If tomatoes were out of season, families improvised by using a round ball of red fabric filled with sand or sawdust. The good luck symbol also served a practical purpose—a place to store pins.  Typically, the tomato is filled with wool roving to prevent rust, and the strawberry is filled with an abrasive to clean and sharpen the pins."


     I made the little wool pincushions with yarn I had in my knitting stash.  I posted how I made them here. 


      I made this big crazy, wonky pink pincushion with wool felt that I filled with emery, the best of both worlds.  It's really heavy and great for using at the machine because it's low profile and it doesn't get in the way of my sewing.


   I bought this felted wool pincushion because it's so pretty.


   I have a few more pincushion projects that I want to make.  There is a completely cute pincushion made using a 3" embroidery hoop, the tutorial is here.  And I know I really, really, really need a very cute ring pincushion to have for my hand stitching sessions, and that tutorial is here.

Sunday, October 19, 2014

Making Needlebooks With 100% Wool Felt

     Last week I received 10 different 6" x 8" sheets of 100% wool felt in shades of blue, purple and green that I bought from an Etsy seller.   I bought the small sheets to make needle books and they are the perfect size.  I love needle books and I really like the 100% wool felt for needle books, it's pretty stiff and wool is great for needles and pins.  I wanted to make one for my Secret Santa Swap partner and after I made hers, I decided to make one for myself and one for my daughter.  I used embroidery floss to put the front and back together with the classic buttonhole stitch and also to make the lazy daisy decorations on the front.  The ribbon closure is grosgrain ribbon I had in my stash.  Here a picture of the prettiest one.