Pages

Showing posts with label bag. Show all posts

Wednesday, August 11, 2021

Farm Aprons , Patriotic Pennants, Vinyl Front Cross Stitch Project Bags, and Secret Sewing


            I finished the farm aprons that I have been wanting to make since I found this duck fabric in my stash.  The instructions from Cosmopolitan Cornbread blog were very good and I was able to get two aprons cut out in less than an hour.  The ironing, hemming and sewing for each apron took about an hour.  These aprons are perfect for going out into the yard to do a messy job or even in the house for a messy job.  I love the big pockets.  


       It's that time of year when I do a little secret sewing for dear daughter's birthday.  I found some lovely colorful fabric that is being turned into something useful for her.  I will show the finished product after they are gifted in November.


       I have some old curtain panels from my bedroom that will be made into tote bags for me and dear daughter.  These curtain panels make lovely tote bags.  Here is a picture of the fabric I'm using.  I have a couple of these already and I gave about 4 of the tote bags to dear daughter a few months ago.  


I've decided to make a patriotic pennant banner with some red, white, and blue fabrics in my stash.  I drew up a triangle to use as a pattern and I made a fabric string from some red, white, and blue fabric I used in my patriotic wall hanging earlier this year.  I cut the fabric for the string like a narrow binding and folded in the edges and sewed it down.  It's perfect for a banner.  I just have to make the pennants.   I want to make one for me and one for dear daughter.  I don't know if I have enough fabric to make two, but a quick trip to Joann's will fix that.  Here is a picture of the fabrics I'm using for the pennants.


        I never posted any pictures of all the clear vinyl front cross stitch project bags I made a few months ago.  These bags are not perfect  and I did not really enjoy making them, but I have to say that the instructions are super easy and they went together very quickly.  They are so much cheaper for me to make then to buy from an etsy seller.  It's a very good use of stray pieces of fabric and batting.  Each bag has a little mini vinyl front pouch to match and all have zipper pulls either made with charms by me or purchased.


Friday, November 20, 2020

Fun Quick Sewing

 Made a zipper pouch from a candy bag using Missouri Star's Tutorial here.  This is a nice quick project and they are really fun to give.  I made one a couple of years ago for dear daughter and she thought that I was giving her a bag of candy.  It was so funny.  Here is the one I made tonight.  It took me about an hour to sew up after I gathered all my supplies and cut up the candy bag.  The one I made tonight is kind of on the small side.  I might frankenstein two bags together next time to get a bigger pouch.  I hope it works.


I've been saving candy bags for a while and I have a whole bunch.  I also have a load of zippers to use up so I think I'll be making some more of these.  

Sunday, August 18, 2019

Spent The Weekend Making Bags

I took some time to sew this weekend.  I made a bag out of the cats in space suits fabric that I bought a couple of weeks ago. 


I made a bag for DD's friend for a birthday present.


And I found some pretty batik fabric to make a fall purse for me.


Friday, August 10, 2018

Beautiful Sea Turtles

I fell in love with green sea turtles when I traveled to Hawaii in April.  I learned that in Hawaii these turtles are called Honu.  I just had to have some fabric with beautiful sea turtles on it.  This evening I made one of my favorite bags with this fabric.  I have enough of this fabric to make a big tote bag, as well, so you will be see at least one more project made with this fabric.


Wednesday, August 8, 2018

More Pretty Bags

   I made a couple of different quilted bags with more of the fabric from Hawaii.


Saturday, March 10, 2018

Sewing, Knitting, Sewing, Knitting, Sewing, And On And On

   I don't have a lot to show for my last couple of weeks.  I've been sewing up drawstring bags for DD for her use in her travels.  She has a big trip planned next month.

    I finally broke out the fabric for my hexagon Grandmother's Flower Garden quilt to cut up some hexies to make some more flowers.  I haven't finished the third row yet, but I think if I get some more hexies made it will spur me to get that third row sewn on.


   I have also been knitting on my Christmas stocking cap.  I'm on the decrease rows right now and I have about 45 rows left to knit.  It should be done next week and I'll be sure to share pictures here.  The red section is now at about 40 inches.  I don't know if it will finish at 48" but I'm really happy with this project. The ribbing was the perfect solution to my too big hat problem.  I think I would love to have a stocking cap in every color.


Friday, December 15, 2017

Another Christmas Decoration DIY

   A few weeks ago I was checking out the gift bag selection in all the stores and I saw some cute gift bags, like the scenes with the red truck and cute trees.  I don't need any Christmas gift bags because I don't give gifts at Christmas anymore, so I didn't buy any. 

    By the time I had the idea to buy a bag and put it in a frame for a decoration in the house, I had missed out on the red truck gift bags but I did find this sweet bag at WalMart to cut up and frame.  I would call this a medium sized bag and I cut it in half, removed the handles (carefully) and put it in an 8" x 10" frame that I also found at WalMart.  I think this cost me $7.00 to make.

    I love this.  I will definitely be doing this again next year. 


Wednesday, October 18, 2017

The Best Gift Bag Tutorial


     I was wondering how to wrap my daughter's little birthday presents the other night and I realized I could make something really cute with my fabric.

     A few years ago I found this tutorial for a gift bag that is so easy to make.  The directions are great and even if you have never made a bag before, I'm sure you can make this one.

      The little bag that is made from the tutorial is wonderful for small gifts but the best part about this pattern is that you can make the bag any size you want and it turns out great.  I know, because I just did it.  The bag I made the other night is extra scrappy and not very pretty, so I won't be showing a picture here, but you can use coordinated fabrics and make a beautiful bag any size you want.

      I will show you this little bag I made a couple of years ago using this tutorial.  I use this as a purse sometimes.  I even added some batting to the straps to pad them a little bit.  If I lay this bag flat is measures 14" wide by 10" deep. 


      The trick to making the bag any size is to make the lining the same size as the outside of the bag.  So if you made the outside of your bag 14" x 18" then cut a piece of fabric 14" x 18" for the lining and follow the directions.  It works great. 

     You can also adjust the straps on the bag.  You can make them as wide and as long or short as you want. 

    If you are making the bag bigger, you will want to make your boxed corners a little deeper.  When I made my scrappy bag the other night, I sewed and cut my boxed corners at 2". 

    You can also change up how you place your fabric.  Just because they have a solid bottom and scrappy sides doesn't mean that's the way you have to make yours.  I made my scrappy bag with a scrappy bottom and solid sides.  You can make the entire outside from one piece of fabric as well.  It's really easy and I like to say if I can do it, anyone can. 

Monday, April 11, 2016

My Favorite Market Bag Made From Cotton Yarn

    I found a lovely market bag pattern on the Lion Brand Yarn website a few years ago and made one to give away to a family member.  The patterns was really easy and I've been wanting to make one for myself because I love the shape of the bag an the handle.  I finally made it last Saturday.

   This is a free pattern but in order to get the pattern you have to create a free login on the Lion Brand Yarn website.  There are several market bag patterns on the site and this one is just called Market Bag and has one center handle.  On the website this bag is pictured in a dark blue yarn.

    I used Peaches and Creme Cotton Yarn in the Ivy League colorway that I bought at Walmart on Saturday morning.  I bought a cone of 706 yards for under $10.00.  You need approximately 360 yards of yarn to make one bag according to the pattern.  I probably have enough yarn leftover to make a little smaller version of the bag.  

   I always hand wind my yarn into balls before I start a project.  This gives me a chance to check the  yarn for joins and imperfections before I start my project.  This process also ensures that I won't run into a big yarn tangle at the end of a skein while I'm working which can be quite frustrating for me and really doesn't help me finish my project.    

   Here's my new market bag.


Thursday, March 10, 2016

Cutting Scraps


   I spent some time the last couple of days cutting up the scraps I created from the fourteen project bags I made last week.  I cut the scraps up into 3" x 3" and 2" x 3" sizes.  I ended up with a lot of little squares for a future quilt project.


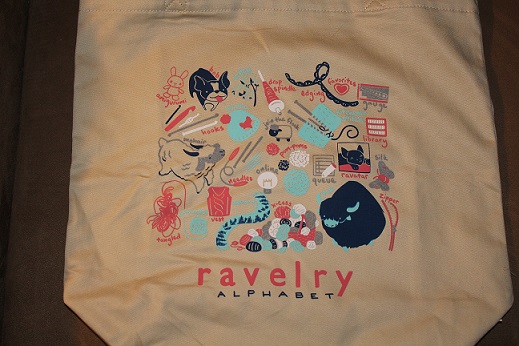
   I bought myself a tote bag from the Ravelry website to help support a wonderful message board.  I love the crazy artwork on this bag.


Thursday, January 28, 2016

Enlarging A Free Pattern To Make A Scrappy Purse

      I love this tutorial for this little Friendship Bag.  Tutorial here.  But the finished Friendship Bag is so small it's only good for gift giving.  I wanted to make it bigger so I could use it as an open purse.  I increased the size of my strips from 1 1/2" x 5" to 2 3/4" x 8" to make this bag bigger.  It's now the perfect size.  All the stuff I carry for local errand running fits in here and since I didn't make a closure for the top, it's all easy to get to.  There are no inside or outside pockets, it's just a boxy, scrappy bag.  I love it.  I used fusible fleece instead of batting, fat quarters for the strips and handles, and some batik yardage that I had for the bottom and the lining.  I also put some fusible fleece in the center part of the handles to make them softer on my hands.   I worked on this for about 2 1/2 hours that includes ironing fabric and cutting.  This was a really easy pattern to enlarge.  My bag measures 12" long x 7 3/4" tall x 5" wide.  This was fun to make.


Sunday, December 13, 2015

Project Bag for Crochet Thread Projects

    I needed a project bag to keep my thread and my doily project safe from kitty claws.  All I had available were large grocery tote bags, so I went on the internet and found a tutorial for a drawstring bag which turned out to be perfect.  You can make this bag as big or as small as you want.  This is the link to make it-love it tutorial.

   I did make my bag a little different.  I made my bag a couple of inches bigger all around, I did french seams so there are no exposed seams inside, I made my drawstrings out of 1 1/2" cotton strips folded and sewed, and I left my drawstrings free since I won't be wearing mine.

    I love it, and I love the fabric I used.  I forgot I even had this fabric.  The instructions in the tutorial were great and this was a really easy project.  I know I'll get a lot of use out of this bag and my doily projects will be safe.


Saturday, October 31, 2015

Found A Quick Way To Make My Shower Curtain Quilt

   So I'm sewing along on my tote bag projects and watching videos on the computer and I found a great way to make quilty shower curtain.  I love the Big Star quilt pattern and last year I made a quilt using the pattern.  I made the stars with 10" and 5" squares.  So easy and so much fun to make.  This is a picture of the quilt top before I sandwiched it.


   So I went stash diving yesterday to find big pieces of fabrics to cut 20" squares for my shower curtain star.  My star measures 52" x 52".  I'm going to add borders to make it bigger.  I want it to measure  at least 68 x 68".  To finish it I will add a backing fabric, do some straight line quilting, and put 12 buttonholes at the top to hang it.  Not a good picture, but it's not finished yet.  


   I finished all my tote bags.  I made four of them.  Super fun and really useful.  It was kind of hard for me to get a picture of all of them together.  Now I have some tote bags that match my bedroom curtains.  Fun stuff.


   I also finished my potholders that will be my hostess gift for Thanksgiving dinner.


Tuesday, February 24, 2015

Making Tote Bags


       I have Crafty Gemini's Must Have Tote Bag pattern.  It's a great pattern.  You take one yard of decorator cotton and about an hour and a half and you have a super gift for a co-worker.  This time I did something a little different with my gift tote bag, I dressed it up with a pretty embroidery on the pocket.  The embroidery was done with my embroidery machine (I bought the pattern from Embroidery Library) and it was super simple to add to the pocket.  When I learn how to embroider monograms I can start using monograms on the tote bags.

    These tote bags are a great size and are very durable.  I have about three that I made about three years ago and they are still going strong.  The side and bottom seams are finished with french seams and the edges of the pocket are enclosed as well as the edges of the straps so there is no fraying anywhere on your tote bag.


    My gift tote bag for a birthday.


I made an extra one to have on hand.


   I'm currently working on my barn quilt.  I've come to the conclusion that I am not a painter.  I hate waiting for paint to dry.  I should have the varnish on it by Sunday.