Pages

Showing posts with label cutting. Show all posts

Saturday, August 1, 2020

Twinkle Twinkle Scrappy Stars by Lori Holt

      I found this tutorial by Lori Holt for scrappy stars and I fell in love.  I made a star with her tutorial today and I'm planning to start cutting some stash fabrics for this quilt top.  I usually don't work on more than one quilt at a time but since my current quilt project is just putting scrappy 2.5" squares together which is extremely easy, it won't be hard to fit in a few scrappy stars in between rows of the squares.   These stars are really easy and fun to make and I think they are incredibly cute.

    These two scrappy quilt top projects will help me whittle down my scraps and stash.


Saturday, December 7, 2019

I Made A Quilted Christmas Table Runner

   I have been planning this table runner all year.  I made this one for my dear daughter.  I am going to make a second one for me. 

    Trying to find the best block to use in this table runner took me almost all year.  I knew I wanted to use solid pieces of the pretty Makower fabric alternating it with a pieced star block, I just couldn't find one a block I was in love with.  I finally found a block in one of my Civil War quilting books.  I found the New England block in "Civil War Sampler" by Barbara Brackman.

     Here is a picture of the runner out.  It's 84 inches long and 12" wide.


    I think the New England block looks like a Christmas gift wrapped up and it still has star points.  I love it.  The book only includes cutting instructions, so I was careful with my piecing.

    Here are the individual blocks up close.


Friday, August 10, 2018

Instructions For My Purse

This post will memorialize the instructions for how I make my favorite purse.  

In the previous post there were two bags pictured.  The one on the right is the best size for everything I carry to work or shopping, including my eyeglass case, my cell phone, a wristlet for identification/debit card/money, my keys, inhaler, lipstick/Blistex and hand sanitizer.  

The bag on the left is deeper and narrower and it's a great tote bag but I don't like it to use as a purse, everything goes to the bottom and it's hard to reach small items.  The instructions to make my purse are here:


I used the tutorial here: http://www.psiquilt.com/2009/08/frie...-tutorial.html.  This is the basic instruction on how to make the bag.  
My modifications are made to the front and back, the bottom, the quilting (I add a back to the piece to be quilted to save my machine from the batting fuzz), the boxing of the corners and the size of the straps.    


Here are my modifications: The front and back are each 8 strips of fabric that are 2.5" wide x 8" long, sewn together.  Or you can use two pieces of fabric 8" x 16" for the front and back.  The bottom piece is 8" by 16".  I put this together following the instructions from the tutorial. In the alternative you can make the front, back and bottom on piece of fabric that is 24" by 16".
 
To box the bottom on this larger size I measure 2" from the tip of the corners.  Since the bag is bigger, I can make the bottom a little wider that the original instructions. 


I cut my straps 4" by the WOF, then I cut that piece in half to make each one approximately 4" x 21". 


When I quilt the sides and bottom, I put a piece of backing fabric on this piece. I don't like to quilt with just the batting on the machine. I don't like the fiber from the batting getting into my machine.  

I have another piece of floral fabric and the sea turtle fabric that I made a bag with already.  I should have all my bags done in the next couple of weeks. 

Wednesday, December 13, 2017

Rustic Christmas Tree Ornaments And A Quick Product Review

   I made tree ornament with the mason jar band and strips of fabric.  They turn out like little wreaths and they are super cute. I love rustic bows and buttons.  Here is a link to the video tutorial (it's the first ornament she makes in the video) homespun tree ornaments link.   The person in the video uses only homespun fabric for her ornaments but I used a mixture of homespun and Christmas patterned quilting cotton.  I think this will work with any fabric.  Have fun with it.

    I found out while making these ornaments that I desperately need a new glue gun.  I've had my Aleene's Glue Gun for twelve years and I dread taking it out to use because it takes so long to heat up and the glue just doesn't flow very well.  It's time for a newer model.  I went shopping on Amazon tonight and picked out two glue guns, one that takes full size glue sticks and has two temperature settings and a mini glue gun that is high temperature only.  I'm looking forward to upgrading my equipment.  I hope to do a review of my glue guns after I have had a chance to try them out.

    Here are the ornaments I made tonight.  I will definitely be making more of these.


    I want to mention that when I made my pleated/textured Christmas tree I used a product called Craft-Fuse by Pellon (Style 808) Iron-On Backing For Crisp Hand & Added Body.  It's a heavy duty fusible interfacing, and I used it to stabilize my tree piece while adding the sides to it.  It worked great.  It fused easily to the fabric and stayed put once it was ironed.  So if you are looking for a heavier weight interfacing to stabilize that is fusible, try Craft-Fuse.  It really works.  I bought two packs of this from Amazon about a year ago and I forgot I had it until I was looking for interfacing to do this project.  I'm glad I had it.

Thursday, June 15, 2017

Making Paper And Fabric Pieces For My Hexagon Quilt

I'm making my own hexagon paper pieces to use in my current quilt project.  In my last project I used old greeting cards and some junk mail and my Fiskars paper punch to make my hexagon paper pieces.  I also made some of my papers out of a heavy 110 lb. 8.5" x 11" white cardstock and those papers lasted the best and I was able to reuse them much longer than the others.  So I'm using the cardstock in this project.  The Fiskars paper punch is labeled an extra large, (I bought it on Amazon a couple of years ago) the sides measure 1" and the longest measurement from one point to another is 2".   I can punch out 20 hexies of this size from one sheet of this size cardstock.  I like to have lots of the papers available so I can baste enough hexies to make more than one flower at a time.

At this stage I cut the edges off leaving a piece big enough to punch out an additional 6 hexies.


All of my yellow centers are basted and ready to have flowers created around them.  This is all the fabric hexies basted.  


Time to cut more fabric.  To cut the fabric, I use a paper hexie with a 1/4" seam allowance added to it and I trace the shape onto the back of the fabric and I cut out each one with my trusty Gingher scissors. 

Here is a picture of the back of my hexies in my first block of this quilt.  I basted the hexies with blue thread so it's easy to find and remove when I take the papers out.  This block is ready to have the paper removed from the yellow, orange and pink pieces.  I leave the papers in the green ones until I have another block added to it.


Here are some hexies I made and put together.  I want to use these as a decoration on a bag in the future.


I

Tuesday, October 11, 2016

Cutting Fabric and Sewing It Up

I cut all the squares for the next two quilt tops.  The shorter stack of blue, orange and white is for the Carpenter's Star and the taller stack of purple, blue, green and white is for the pinwheel.  I have no more quilt projects planned.  When these two tops are done, I will have 5 quilts tops ready to finish.  


I was playing with some 10" squares and 2" strips the other day and I created these four blocks. This is an idea for a future quilt, not sure if it will be a two color quilt or not.  They were fun to make and super easy.


Thursday, March 10, 2016

Cutting Scraps


   I spent some time the last couple of days cutting up the scraps I created from the fourteen project bags I made last week.  I cut the scraps up into 3" x 3" and 2" x 3" sizes.  I ended up with a lot of little squares for a future quilt project.


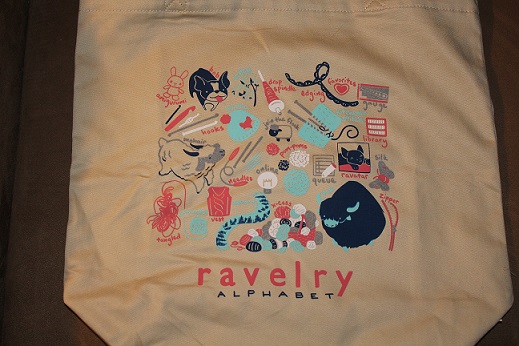
   I bought myself a tote bag from the Ravelry website to help support a wonderful message board.  I love the crazy artwork on this bag.


Saturday, February 27, 2016

Cutting Out Fabric to Make Lots of Bags and Crocheted Embroidery Hoops

   I'm making a bunch of Two Kates Project bags.  I love this beautiful bag pattern and I thought this would be a great project to use up some of my fabric stash and I need some new project bags for my knitting and crochet projects.  This bag is perfect to store my yarn projects because it doesn't use a zipper  or a drawstring and it's a nice size.  The link to the .pdf pattern is here. 

   Tonight I cut out fabric to make thirteen of these bags.  The picture of the bright green lady bug fabric at the end is a bag that will be given to dear daughter.  She loves lady bugs.  Most of these bags have the same fabric for the lining as the outside but a few of them have different lining fabric because I didn't have enough fabric for both.


   I'll be sewing on these bags for the next few days.

   I finished crocheting the borders on the rest of my 3" embroidery hoops for my Christmas tree project.  I did all of these crocheted borders with embroidery thread.  It was a lot of fun to do.  To finish these hoops I still have to add some embroidered trees.


Tuesday, November 24, 2015

My V.I.P. Bear, Henderson

   Meet my new friend, Henderson.  He is a pre-printed panel bear that I found on etsy or ebay a couple of years ago.  The title on the instructions call him "The V.I.P. Bear."  The panel has all the pre-printed pieces, you cut them out and follow the directions.  I love to make teddy bears. I have a pattern for a 16" bear that I make with mohair fake fur fat quarters, but I couldn't resist this fella when I saw him for sale.


    I fashioned his vest from a sewing tutorial I found on youtube.  All I needed was the shape and I had a vest.

Tuesday, January 13, 2015

My Fabric Yarn Is In Progress


   I cut my 1" wide (give or take) strips last night and tonight I sewed a lot of them together.  Since I'm going to be crocheting this all up I didn't worry about right sides together or making sure each end was straight, I just put them together selvages and all.  This is the ball of yarn that I have done so far.  And since I like to keep track of how much time things take (I don't know why, but I'm obsessed with time), it took me about an 45 minutes to cut the strips for this ball of yarn and another 45 minutes to sew all of these together.  I'm really enjoying making the yarn for this project.


  I didn't have a lot of pink and green fabrics leftover from the quilt because I only purchased 1/2 yard pieces to make the top, but I did find some pink and green fabrics in my stash that I am cutting into strips for my yarn.  I don't know how much yarn I will need.  I think I'll make another ball of yarn to match the size of this one and start crocheting my rug, then if I run out before I finish I can make more yarn.

   I hope to have a new bathroom rug soon.