Pages

Showing posts with label quick. Show all posts

Saturday, October 5, 2019

Three More Ear Warmers Done

   I knitted up three more ear warmers in the last couple of weeks along with the turquoise one from the last post.  I picked out yarn for two more and I'm halfway through the first of those two.    I knitted a white one, a mulberry one and a dark blue one.  I'm really loving how I made these.


Monday, August 13, 2018

Modifying Another Free Pattern From A Blog

  I love the internet.  I don't know how I did any sewing or crafting before the internet.  I admire the super smart folks that post sewing tutorials with written instructions and pictures on their blogs so we all can make lovely items to use.  When I find a pattern I really like but need to modify, I don't mind taking those clever instructions and adjusting them to meet my needs.  It seems like I have been doing this a lot lately.

    I spent part of last Sunday modifying a water bottle carrier pattern that I found on one of those super smart blogs to accommodate a larger than 16.9 oz. bottle of water.  This carrier will swallow my largest water bottle and it's perfect.

    I had already used these instructions back in 2016 to make a regular size water bottle carrier for a normal 16.9 oz. plastic bottle like a Zephyrhills bottle.  That water bottle carrier is still in use, but sometimes I want to carry more than 16.9 oz. of water and for that I need a bigger carrier.

    When I made that regular size water bottle carrier in 2016, my daughter made one for herself, but she was thinking ahead and she modified the size so hers would be big enough for her big water bottle.  I helped her make that water bottle carrier, but unfortunately I didn't take any notes on the modifications she made, so I had to start from scratch.  That's one of the reasons I have been blogging about how I make my changes so I can just look them up in my blog.

    I started with the instructions at this blog post:   Instruction for water bottle carrier.  

   I didn't bother to measure my bottle because I have two big bottles, a 21 oz Camelbak and a 32 oz. Contigo and I wanted this carrier to be big enough for either bottle.  I figured whatever I ended up with would work fine for what I needed.  Here are my modifications.

  1.   I didn't bother to piece the outside of the carrier with coordinating fabric like the blogger did.  I hardly ever have coordinating fabric and I wanted to use my souvenir Hawaii fabric for these so I cut two pieces of fabric for the body of the carrier (the outside and the lining) 14" (width/around the bottle) x 12" (height/deep)  or you could cut one long rectangle that is 28" x 12" and just fold it where the two pieces would be seamed.  I also cut one piece of Insul-Brite 13" x 11" for the body of the carrier according to the instructions.

   2.   Since I didn't measure and I couldn't determine how big the circle bottom (2 pieces of fabric and one piece of Insul-Brite) had to be I cut mine at 8" in diameter which was way too big.  I ended up trimming this down to about 4.5" in diameter after the body of the carrier was put together.

   3.  I followed the instructions for sandwiching and quilting the body of the carrier and the circle bottom.  I sewed the body up to make a tube and I sewed a French seam here to enclose the edges.  I measured the circle bottom and trimmed my large circle down so it would fit and I attached it according to the instructions.

   4.  This water bottle holder will be holding heavier weight with the larger bottles, so I made my strap from the fabric I used for the rest of the project.  I think fabric straps are more comfortable than webbing and definitely stronger than ribbon.  I cut two  3" strips the width of the fabric.  I sew the short ends together to get one long strip, then I make the strap like the one in this tutorial:  Friendship Gift Bag Tutorial.   This is how I make the straps for most of my bags, wristlets and totes.  They are really sturdy.  One other thing I did was to hem the two short ends of the strap that are being attached to the body of the carrier by turning them up before I topstitched each end.  These straps are not enclosed and hemming keeps them neat.  I trim this strap to be about 56" long, which measures about 26" from your shoulder (taking into account that I used an inch on each end to attach the strap to the carrier).  You can make the strap as long or as short as you wish.  If you find that after you attach the strap that it is too long, you can just tie a knot in it to shorten the length.

   Those are my modifications and here is the final product  Pictures of the bottles in the carrier and pictures of the bottles next to the carrier.  I will definitely be making more of these.


   This took me about 2 hours to make from cutting fabric (not my favorite part of sewing) to final stitch.  That time includes finding the right color of thread to use, filling a bobbin, and moving kitties off my ironing board every time I had to use it. (LOL).

Saturday, August 11, 2018

Okay, This Is One Quick Project

  I made this purse from more of my souvenir fabric last night after work.  It took me about an hour and 45 minutes.  Love this.


   And I made this one this morning.  More souvenir fabric.


Monday, October 10, 2016

Quilt Pattern Fail, Moving On

  I bought a Quick Curve Ruler in March of 2015(posted about it here) and I purchased fabric to make the Metro Twist Pattern in August of 2015 (posted about that here).   I tested the pattern yesterday.  I found out that I hate sewing curves and I hate trimming what you make with those curves.  It was all too fussy and it wasn't coming out so great.  So I'm calling it a fail and I'm moving forward.

   I settled on the Carpenter's Star pattern for these fabrics.


  It will be pretty easy and this is what it will look like.


  I'm cutting my squares at 8" and with a white border all around should give me a 75" square quilt.

Thursday, January 28, 2016

Enlarging A Free Pattern To Make A Scrappy Purse

      I love this tutorial for this little Friendship Bag.  Tutorial here.  But the finished Friendship Bag is so small it's only good for gift giving.  I wanted to make it bigger so I could use it as an open purse.  I increased the size of my strips from 1 1/2" x 5" to 2 3/4" x 8" to make this bag bigger.  It's now the perfect size.  All the stuff I carry for local errand running fits in here and since I didn't make a closure for the top, it's all easy to get to.  There are no inside or outside pockets, it's just a boxy, scrappy bag.  I love it.  I used fusible fleece instead of batting, fat quarters for the strips and handles, and some batik yardage that I had for the bottom and the lining.  I also put some fusible fleece in the center part of the handles to make them softer on my hands.   I worked on this for about 2 1/2 hours that includes ironing fabric and cutting.  This was a really easy pattern to enlarge.  My bag measures 12" long x 7 3/4" tall x 5" wide.  This was fun to make.


Wednesday, January 27, 2016

Kitties For All Seasons

   I had these blocks from the A Cat For All Seasons panel for several months.  I bought them to make some quick decorations for my front door.  I backed them with some floral fabric and sewed them up.  No batting, no quilting, no muss, no fuss.


Saturday, October 31, 2015

Found A Quick Way To Make My Shower Curtain Quilt

   So I'm sewing along on my tote bag projects and watching videos on the computer and I found a great way to make quilty shower curtain.  I love the Big Star quilt pattern and last year I made a quilt using the pattern.  I made the stars with 10" and 5" squares.  So easy and so much fun to make.  This is a picture of the quilt top before I sandwiched it.


   So I went stash diving yesterday to find big pieces of fabrics to cut 20" squares for my shower curtain star.  My star measures 52" x 52".  I'm going to add borders to make it bigger.  I want it to measure  at least 68 x 68".  To finish it I will add a backing fabric, do some straight line quilting, and put 12 buttonholes at the top to hang it.  Not a good picture, but it's not finished yet.  


   I finished all my tote bags.  I made four of them.  Super fun and really useful.  It was kind of hard for me to get a picture of all of them together.  Now I have some tote bags that match my bedroom curtains.  Fun stuff.


   I also finished my potholders that will be my hostess gift for Thanksgiving dinner.


Thursday, October 29, 2015

Super Cute Quilt Pattern Purchase

  I saw this pattern for this Argyle Runner at Connecting Threads and I had to have it.  It is super cute and I can picture it in lots of different color combinations.


  Here is the link to the pattern page.   There is also an argyle quilt pattern that has thicker sashing strips.  

   I'm putting a new project on my to do list.  I want to make a scrappy quilt top shower curtain from my stash fabrics.  I will quilt the top to a backing without any batting and add buttonholes in the top to hang it from the hooks.  I already have a vinyl liner so I don't have to worry about it getting wet when I shower.  I measured my tub opening and I can make my shower curtain quilt about 72" by 72".  I just have to decide what size to cut my scraps.

   I also found this cool youtube tutorial for a simple quilt with applique squares onto a background fabric so it looks like you pieced it.  It's super cute and it's called The Quick Little Block Quilt.  Here is the link to the tutorial.  Ms. Laura Coia has a lot of youtube sewing tutorials.

Saturday, October 10, 2015

New Bedroom Curtains

  I finally finished my floral bedroom curtains.  I love this fabric and all the pink and green that is going on here.  They were fun to make and super quick.


Super Quick Sewing Machine Service

     This past Wednesday I took Martha, my Bernina 1530, in to the shop for a service and to have the electrical cord fixed.  I wasn't expecting it back for a couple of weeks at the earliest, but on Thursday I received a call that my machine was ready for pick up and it was fixed.  That's what I call super quick service.  I picked the machine up yesterday.

    This machine has a retracting electrical cord which I love.  When I finish using the machine and want to move it, I just push a button in the back of the machine and the electrical cord retracts into the machine.  It's a neat feature.  The foot pedal cord does the same thing.  I never have to worry about losing either cord for this machine.

    Martha and her new cord.


  The machine cord and the foot pedal cord all tucked in.


    Close up of the foot pedal cord retracted.


   I'm hanging my bedroom curtains today (finished them last night) and I am getting ready to cut that lovely yellow fabric for the dining room and living room curtains.

   I'm also going to make a scissor pouch for my big, expensive Gingher scissors.  I found this youtube tutorial to make this cute pouch.  Scissor pouch tutorial link here.

Friday, September 4, 2015

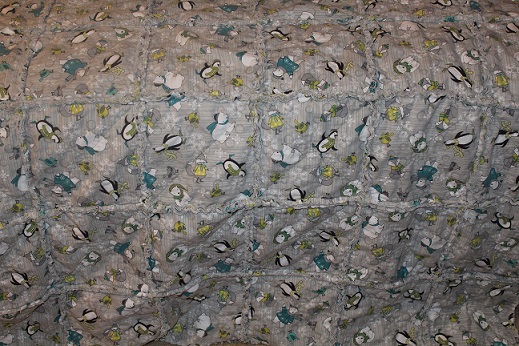
Rag Quilts Are So Much Fun To Make.

  I finished my rag quilt this morning after snipping all the seams to help them fray.  It was awesome!  I washed the quilt this evening (cleaning out the dryer vent every 12 minutes).

 Snipped but not washed.


Washed and officially ragged.


I also made these two blocks into wall hangings.  They came in a panel of 4.  They measure 17 3/4" x 17 3/4" before binding.  I've had them stashed for a few months.  I wanted something feline for the wall in the hall by the cat's room, one will go there, the other hang on the inside of the front door.  These were fun to quilt and bind in one afternoon.


Thursday, August 20, 2015

Missing Colors

   I was thinking about my fabric stash a couple of days ago and I realized that I do not have a lot of orange fabric in my collection.  I think I have one or two small pieces of orange fabric.   The same thing goes for purple fabric.  I'm fixing that little problem this week with some fabric purchases.

   I just bought 4 yards of this fabric from an etsy seller.


Pairing the orange with this fabric I just found at Joann's on sale for $5.99 a yard.  Yippee!


   I'll be using these in my next quilt project with plain white as my background fabric.  I'll be using my new Quick Curve Ruler by Sew Kind Of Wonderful to make the Metro Twist Pattern.

   I'm currently working on my sunflower door decoration.  That should be done soon.  


Tuesday, March 24, 2015

The Quick Curve Ruler


   I bought a Quick Curve Ruler by Sew Wonderful last week (it was on sale at Connecting Threads) because I saw this super cool video tutorial here.

  Here's the link to Sew Wonderful's free pattern pages.  I love this pattern and I can't wait to try my new ruler out.


Monday, January 12, 2015

It's All About Flexibility


    I know everything doesn't always go smoothly in my crafting world, but I had two major fails in two days and I had to go back to the drawing board on a project and a purchase.

    The first fail was my bathmat project.  I was going to make a bathmat like a mini quilt with a towel as my backing fabric but it was not to be.  The towel stretched when I was sewing my fabric on it and I got really frustrated with it.  I had to re-think my options for making my bathmat and I've decided to crochet one with fabric strips.  Crochet is really fast and when you use a big hook with big fabric strips, it goes really quickly and I really like to crochet.  The tutorial I will use to figure out how wide to cut my fabric strips, how to join them, and what size crochet hook to use is here at Crazy Mom Quilts.  I'll be pulling my fabrics out tonight and I'll start cutting them up.  I wonder how a dishmat for the kitchen counter would work made with crochet.  I have some curtain fabric leftover with some other blue and yellow fabric that would be fun to crochet.
     The second fail happened this morning when I finally opened the package that contained the Brother Software I bought to integrate purchased embroidery designs onto my Brother PE 770 embroidery machine.  I looked at the package and the Windows operating systems listed on it were all the old systems and my computer is running Windows 8.1.  I had no idea that they would be selling something that ran on these old systems.  I've emailed the company to see if I can return it for a refund.  In the meantime I had to do some additional research to find a reasonably priced replacement.  After checking the threads on Quilting Board again, I found Sew What-Pro software.  I did check some reviews on this software and it seems to be just what I need and it's even a little cheaper than the old software I purchased.  Here is a link to purchase the software.

    I never know when I'm going to have to change gears to get something done, so I try to be flexible with my ideas.  I hate to totally give up on an idea until I've tried it a different way at least once.  Dear daughter would say I'm stubborn (like my Dad), but I prefer to say I'm persistent.


Friday, December 12, 2014

Flannel Purchased for Quick Blanket

    I need one more blanket that I can take from bedroom to living room so I went searching for some flannel.  I found lots of cute flannel on sale, but these panels really caught my eye.  I just purchased 6 of them to make a nice big, quick blanket.  The panels are 24" x 43/45", so three on each side for a double sided blanket will be perfect.  I love the applique look on it.  So pretty.  Five seams and one round of top stitching and I'll be done.  I can fit this project in one evening when I don't feel like working on the pink quilt.


***Edited to update on this project.  I received the flannel on December 18th and it came all in one big piece so all I had to do was wash it, fold it in half (right sides together) and sew up the two long seams and part of the short seam, turn it right side out and top stitch all around.  It took me about an hour to do the sewing.  So easy and it's really pretty fabric.