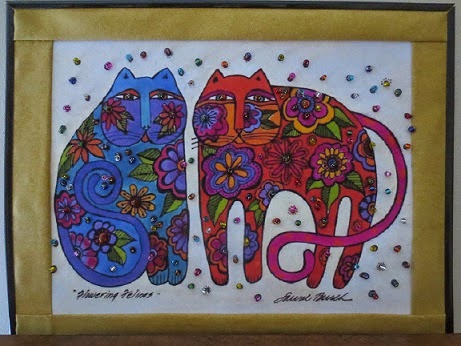
I found this pretty picture on the internet. This is an art drawing by Laurel Burch. It's called "Flowering Felines."
Ms. Burch drew colorful pictures of cats, dogs, horses, sea life and plant life. Unfortunately, Ms. Burch passed away several years ago. I found her work after I bought my bengal kittens, Taffy Morgana and Merlin almost 10 years ago. I was all into cat everything and I knew I had to have some Laurel Burch cat stuff. I bought a few pieces of jewelry, two pair of socks and three bags, but I never had anything by her to hang on my wall. This picture is going on my wall with a few enhancements.
Here are the two pair of enamel earrings that I cherish.


Back to the picture. After looking at Flowering Felines for a while I decided that beads were the way to go. I wanted this picture to shimmer when the light hit it. I printed the picture onto a fabric sheet made for my ink jet printer. I used Avery 3384, 8 1/2" x 11" printable fabric sheets. It worked very well in my HP ink jet printer and it printed right the first time. When you use this type of product you have to make sure you put the fabric sheet in paper tray right so the picture prints on the fabric side. The other side is glossy and has the adhesive to make the sheet an iron on. I did a quick print test to make sure I put the fabric sheet in the paper tray the right way. I mark a piece of paper indicating which way the paper was set in the paper tray so after I print I can figure out which way my fabric sheet should go in. It only takes a minute to do and is worth the trouble to get the picture printed right on the fabric sheet.
After printing my picture, I ironed it to a piece of muslin to stabilize it before I started adding beads. The piece was stiff and I could not put it in an embroidery hoop. I also had a hard time finding the exact spots I wanted to put my beads from the back side of the work, but I used a flashlight to pin point the exact spot I wanted to put my needle in from the back and that helped a lot.
I did all the beads in the cats first, then I added the orange borders and finished beading the dots outside of the cats. By the way, I thought sewing the orange borders on through the fabric sheet would leave an adhesive residue on my sewing machine needle, but it did not and it was really easy to sew through. That was a nice surprise. I used gold metallic embroidery thread to put the beads on and it was a real pain to work with. I had a hard time separating my threads and keeping them from shredding while I sewed, but I wanted shimmer and I thought cotton embroidery thread would dull the shine of the beads. I used multi colored 6/0 glass beads by Craft Designer that I found at Joann's Fabrics.
The beading was done and it was time to frame this. I bought the frame at Walmart for $5.00. It was a 10" x 13" floating frame and the black part of the frame is actually clips that secure the piece to the glass. Super easy.
Up close of the beads.
Cost for my picture was about $15.75.
Done.