Pages

Showing posts with label felt. Show all posts

Friday, December 27, 2019

Christmas Has Come And Gone But I'm Not Done Making Decorations

I can't believe how many cute ideas I found to distract me this year.  I'm still working on several projects that are Christmas related.  I'm afraid that I will be Christmas crafting into the New Year.

I did manage to finish dear daughter's table runner, some small  tree ornaments, and her star garland, but I'm still working on the decoupaged cookie plates, my table runner, some fabric covered Christmas tree forms,  and a star garland for me.  My star garland may go up after I finish it and stay up all year.   Here is a picture of dear daughter's garland on her China cabinet.  She added fairy lights and it looks pretty.  I love the way this turned out and the stars are so easy to make. 


Other things I want to make are felt tree ornaments.   I found this picture on the internet and thought these felt ornaments were adorable.


I saw this picture a bunch of times for different ads.  The day I took this picture they were advertising Hobby Lobby craft store.  I have not been able to find this picture on Pinterest with a link to instructions or patterns, so dear daughter I made our own ornaments with green felt in the shape of a Christmas tree and we beaded them for her co-workers.

I also want to make some string art.  I found a string art star with instructions here.

As usual, I spent too much time watching YouTube videos showing items made from thrift store finds and I saw some interesting wood burning ornaments being made by using 4" wood rounds that you can get at Amazon.

One person was walking through a Antique store or 2nd hand shop and I also saw something I have to make.  It's a paper garland made from hymnal pages.  It's super simple, fan folding the pages and gluing a bunch together to make a long piece that you wind around a piece of twine.  I don't have a good picture of it but I took this screen shot from the video where I saw it.


I have looked on Pinterest and all over the Internet for a better picture or even instructions but could not find anything similar.  I fell in love with this garland, so much so that I bought a Baptist hymnal on Christmas day for this project.  I have the glue and twine.

I don't know when I'll finish Christmas decorations, I just hope I finish before next Christmas.

Sunday, March 3, 2019

Fun Cow Creamers Transformed Into Pin Cushions

   I have a blue delft pottery cow creamer that I bought from eBay several years ago that I made into a pin cushion.  I felted a flat disk of wool yarn and inserted that into the body of the creamer.  It works well.  I even named her Blue Bell. 

    I was checking out eBay last week and found a souvenir Hershey cow creamer that I had to have.  She is smaller than Blue Bell but she is awesome.  She has a red ribbon around her neck  with a faux bell on it.  I plan to add a pink tongue to her mouth, like Blue Bell and also insert a disk of brown felted wool yarn in her body to finish the pin cushion.  Her name will be Coco.

   I wish I could have a whole herd of these.  There were some beautiful Polish pottery cow creamers available as well.  Maybe in a few years I'll add another one.

  Pictures.


Monday, December 3, 2018

Heading To The End Of The Year

I haven't posted for a while.  After my last post, I was busy getting ready to go out of town for the Thanksgiving holiday.  My DD and I drove down to Orlando and spent the weekend at Universal Studios/Islands of Adventure riding rides and have a lot of fun.  The four day weekend is a perfect time for us to drive five hours to Orlando.  It's a little crowded at the parks at this time but I don't have any vacation time left at work.  The parks were decorated for Christmas and Christmas music played.  We stay at the Doubletree within walking distance of the park and we had a blast.  We rode all three Harry Potter rides (Escape from Gringotts, Hippogriff roller coaster, Secret Journey at the Castle), had butter beer, lunch at the Three Broomsticks in Hogsmeade, saw the dragon in Diagon Alley, we rode rides at Dr. Suess Land, we rode the Men in Black ride (twice) and I even rode the Hollywood Rip Ride Rockit roller coaster (my eyes were closed almost the entire ride).  It was an awesome weekend.

I missed cooking a big meal for Thanksgiving, so this past weekend I made myself a homemade Thanksgiving dinner with roasted vegetables, homemade stuffing (just the way Mom used to make it), baked chicken breasts (because that was just as easy as a turkey breast), and homemade cranberry conserve.  It was wonderful.  I got up really early on Saturday morning, made everything and had Thanksgiving dinner for breakfast that day.  I'm still eating leftovers, but they won't last too much longer.

I'm knitting my scarf and my hat with the Vanna's Choice in black.  I decided to make the hat into a stocking cap and I bought another skein of yarn to add to the hat.  The scarf is more than half done.  Here's pictures of my knitting progress.

Hat


Scarf

Last night I played with some 5" felted wool squares that I bought.  I made some Swedish heart Christmas decorations.  I thought they would be cuter and I suppose if I used prettier colors they would be.  I made these to give to DD if she wants them for her tree.  I used the Missouri Star Quilt Company youtube video tutorial to make them.  Here's a link to the video:  Link here.  Jenny even provides a pattern you can print out.  She used 5" squares for her hearts as well and that's where I got the idea to buy the squares.


Monday, July 2, 2018

More Snowmen

All the snowmen ornaments are done.  I will not be making any more of these this year.  I still have more white wool, buttons and beads to make more, but they will have to wait.  It took me a whole week to make these ornaments in my spare time.   I will be sharing these with my dear daughter.  These snowmen were so much fun to make, but it's time to move along and get started on other projects.


Wednesday, November 11, 2015

Emery Sand Reclamation

   I reclaimed the emery sand from a pin cushion I made a couple of years ago.  The cotton cover on that pin cushion was looking very old with all the pin holes in it.  So I took it apart and saved all the emery that was in it and made a new cover.  The last time I bought emery sand I bought it at this etsy shop, My Sweet Accent, link here.  I see she also sells pin cushions, but I prefer to make my own.  I have also purchased emery sand from Nakpunar on Amazon, as well.

   I've never used the walnut shells or any of the other nut shells that are sold for pin cushion stuffing because I have not heard good things about them.  One person told me that her pins were sticky with some type of residue from the pin cushion she made with the nut shells.  You also have to be careful because lots of people have allergies to nuts.

    When I make emery sand pin cushions, the emery is placed in its own little pouch so it's contained and easy to reuse.  I took the emery from my old pin cushion and added some that I had leftover in my stash.  It was originally shipped in a zip loc bag, so I just poured the emery from the old pin cushion in with the leftover to hold it until I was ready for it.  I was able to make a new pin cushion with most of that emery.  I wanted to make two pin cushions, but I didn't have enough, so one will have to do.  I made my pin cushion in a simple rectangle shape.

      First I made a cotton pouch to put the emery in.  The pouch was made from a piece of cotton.  I cut a two pieces of cotton 4" x 6" for the pouch.  I sewed up three side of the pouch using a 1.8 stitch length to make it secure using a 1/4" seam allowance.  After I made the pouch, I filled it with emery, very carefully.  I use a funnel and a spoon with the pouch propped up in a small mixing bowl to catch any loose emery, then I hand sewed the pouch closed using very small stitches.

     I made the cover with some wool felt I had in my stash and I cut it just about a quarter of an inch bigger than the original cotton pouch so the emery pouch would fit .  I sewed up three sides of the cover on the machines with the 1.8 stitch length, using a scant 1/4" seam allowance, (when sewing felt you can use a very tiny seam allowance because the material doesn't fray) turned it right side out, slipped the pouch inside and hand sewed the open end.

   It's done.  A new pin cushion with sharpening emery sand for my straight pins.


Red Wool Pin Cushions

     I do not have any red sewing accessories on the table that I keep my active sewing machine on.  It is time to add some red color to my sewing area.  I made a couple of felted wool pin cushions for myself with some wool yarn I purchased just for this project.  I love making these little wool pin cushions.  They are so much fun to make, so simple and so useful.

     This is a short written tutorial on how I made them.  I use 100% wool yarn.  I bought two skeins of KnitPicks.com's Wool of the Andes worsted yarn a couple of weeks ago.  One skein in red and another in cranberry.  This yarn is lovely to knit with.  I've made a few scarves with it, but it's really great for felting.  The bulky variety of Wool of the Andes is also fun to work with.  I was able to make two pin cushions from each of the skeins I bought.

      I wind the yarn into a flat ball.  I couldn't tell how much yarn I had used each time, so I just guessed when I thought I had used half of the skein for the first ball of each skein.  I thread the end of the yarn into a long steel needle and weave into the center of the ball several time to make a little dimple and then I weave the end in the ball of yarn to secure it.  To keep this all together while I'm felting it, I place the balls in a knee high stocking secured with a knot very close to the ball.  I can fit four or five of these small wool balls into a knee high.  You can also use a sock to the do this, but I prefer to use a knee high because I can see through the stocking and I can see if the wool is felted enough.  I wet the knee high and the wool balls thoroughly in the sink with hot water, you can also put them in with a load of wash.  Soap is supposed to help with the felting process, but I usually just rely on water and the heat from the dryer.  Then I dry them in the dryer with a couple of wet bath towels or a load of wash.  The heat and the friction help the wool to felt.  I usually run them through the dryer several times until I like the way they have felted.  In this project, the red wool felted much better than the cranberry wool.  Interesting.


Saturday, August 22, 2015

Fall Sunflower Door Decoration

    I finally finished a sunflower door decoration for use during the fall season.  The flower is made from 100% felt.  I made a petal pattern in 3 sizes for the petals and the center was cut freehand from a 6 inch circle.  I sewed the flower to cotton backing material.  I made the center with points which is different from the normal plain circle.  I also added some dark purple seeds in the center for texture and color.  I was thinking of the Van Gogh sunflowers when I decided on the blue background.


    I enjoyed making this project.  The felt was really easy to sew.  I did a straight stitch around all the edges of the petals.  I used a few pins when I placed the petals and I was really surprised that I didn't have any problem with the felt shifting during sewing.

Friday, August 14, 2015

New Project - Sunflower Door Decoration

  Yesterday I spent some time cutting up 100% wool felt sheets that I purchased several months ago for a sunflower door decoration I want to make for the fall season.  I purchased my wool felt from an etsy seller.  I used a petal pattern that I drew.  Petals are one of the things I can draw along with Christmas trees and holly leaves.  I used three different sizes of petals and two different colors of felt for the petals.  I'm waiting for my background fabric that I ordered a few days ago.  I should have that next week and then I can get the sewing part started.  Here is a little peek at what I did yesterday.


Friday, April 10, 2015

Felted Wool Pin Cushions


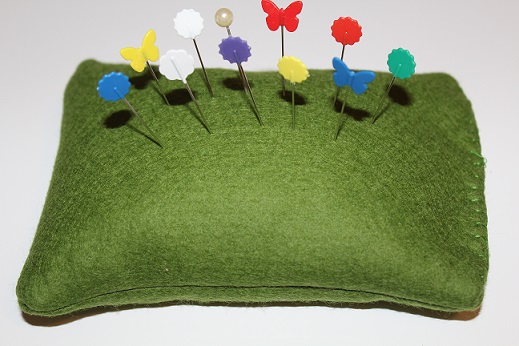
   I made more wool pin cushions last year and I'm just getting around to giving them away on the Quilting Board.  These pin cushions are a big hit with my quilting buddies.  I posted the give away last night about 8:00 p.m. and these pin cushions are already spoken for.

    I got the idea to make these from making wool dryer balls.  The only difference is I try to wind the pin cushions flatter so they will sit and not roll around.   Here's how I make them.  I wind up 100% wool yarn (I used Wool of the Andes bulky yarn from KnitPicks.com for these) into a ball then I start to tighten the yarn and I squeeze the ball flat while I'm winding and I continue to wind until I get a ball about as big as a tennis ball or so.  I secure the end of the yarn by threading a big needle and running it through the yarn ball a few of times.  The yarn ball is put inside an old knee high stocking or you can use a tube sock (you can get about 6 balls of yarn in one knee high).  I like using a knee high because I can see how much the yarn is felting.  Make sure you knot the knee high or sock next to the yarn ball to keep it secure, this keeps it from unraveling.  I wet the whole thing or you can also put it in a load of wash, the soap is supposed to help with the felting process and I pop it into the dryer for several cycles.  It takes about 2 hours to get the yarn to felt.  The balls won't be anywhere near dry so I let them dry out for a couple of days then I remove the knee high.  The wool yarn grabs the fabric of the knee high and you have to peel it off the yarn ball, but it does come off.  Then you have a fun wool pin cushion.


Wednesday, December 17, 2014

Pins, Pins, Pins, and Of Course, Pincushions.

     I love, love, love pincushions and pins.  One of the best things about sewing are all the fun notions I get to have.  Pincushions and pins are so simple and I am one of the sewists that can't sew without them.  I also love that they can be super decorative.  I buy them, I make them, I can't get enough of my pins and pincushions.

   When I make a pincushion I try to fill it with emery sand (not always possible) because it's so good for sharpening my pins.  I buy emery sand on Amazon or etsy.com so it's super easy to get and one pound of emery sand goes a long way.  You only need a little emery pincushions to help sharpen those pins.


       These teacup pincushions (I used the idea from a blog called MrsMMakes, link here) are filled with polyfil because it was the best material to get the nice plump pin cushion top on the cup.  I did cover them with wool (another good material to use for pins).  The pink cup has wool felt I bought in squares from an etsy seller.  The blue pincushion and the green pincushion are covered with felted wool I knit myself.  To make the blue and green covers I just knit a quick square of stockinette stitch from my wool yarn stash, felted it, filled it with polyfil, sewed it up and glued it into the cup.  The teacup is then glued to the saucer.  This is a super quick and fun project and they would also make a great gift for a fellow sewist.  The hardest thing about making these pincushions was finding a not too expensive pretty teacup and saucer to use.  I always go to ebay or etsy for my teacups and I try to buy them out of season like early in the year before Mother's Day and well before Christmas because the prices go up for those holidays.


       I have no idea what is inside these tomato pincushions I bought, I think it is sawdust, but I don't think my sewing room would be complete without a tomato pin cushion, or two or three.  I found the following information on wikipedia regarding these cuties:  "According to folklore, placing a tomato on the mantel of a new house guaranteed prosperity and repelled evil spirits. If tomatoes were out of season, families improvised by using a round ball of red fabric filled with sand or sawdust. The good luck symbol also served a practical purpose—a place to store pins.  Typically, the tomato is filled with wool roving to prevent rust, and the strawberry is filled with an abrasive to clean and sharpen the pins."


     I made the little wool pincushions with yarn I had in my knitting stash.  I posted how I made them here. 


      I made this big crazy, wonky pink pincushion with wool felt that I filled with emery, the best of both worlds.  It's really heavy and great for using at the machine because it's low profile and it doesn't get in the way of my sewing.


   I bought this felted wool pincushion because it's so pretty.


   I have a few more pincushion projects that I want to make.  There is a completely cute pincushion made using a 3" embroidery hoop, the tutorial is here.  And I know I really, really, really need a very cute ring pincushion to have for my hand stitching sessions, and that tutorial is here.

Sunday, October 19, 2014

Making Needlebooks With 100% Wool Felt

     Last week I received 10 different 6" x 8" sheets of 100% wool felt in shades of blue, purple and green that I bought from an Etsy seller.   I bought the small sheets to make needle books and they are the perfect size.  I love needle books and I really like the 100% wool felt for needle books, it's pretty stiff and wool is great for needles and pins.  I wanted to make one for my Secret Santa Swap partner and after I made hers, I decided to make one for myself and one for my daughter.  I used embroidery floss to put the front and back together with the classic buttonhole stitch and also to make the lazy daisy decorations on the front.  The ribbon closure is grosgrain ribbon I had in my stash.  Here a picture of the prettiest one.