Pages

Tuesday, December 29, 2015

2015 - My Crafting Year In Review


 I'm counting down to the New Year. Tomorrow is my birthday, then we have New Year's Eve, then we celebrate New Year's Day.  This week is always just as special to me as the week of Christmas.

   Short Review of 2015

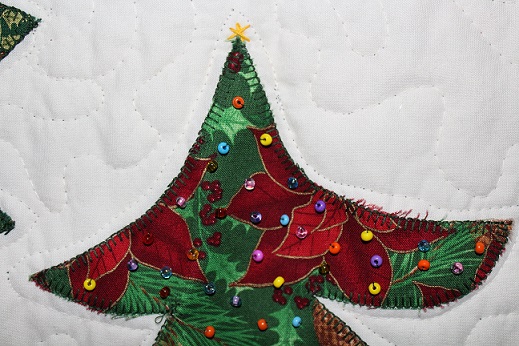
       It's been quite a crafting year for me.  I made a lot of projects this year.  I painted, knitted, crocheted and sewed.  I made yard art, built a quilt ladder, fashioned jewelry and I have more pincushions than I will ever need.  I learned a lot this year about what I'm good at, what I like to do, and what I should not try a second time.  I made some lovely projects and others just didn't turn out like I expected.

     I did a lot of organizing this year to make sure I could find my crafting items more easily.  I replaced some of my old tools with new ones.  I added three sewing machines to my collection and re-homed two machines I wasn't using.  

  I made a lot of projects this year with my sewing machine that I love, but my favorite project would have to be the hanging dishtowels with the button closure.  They are so freaking cute and so easy to make it's hard not to love, love, love them.  This post from November has the link to the tutorial I used and some information on how I made my first, but definitely not my last, hanging dishtowels.

   My biggest fail had to be the bathmat I tried to make in January.  The three posts about that fail started here on January 12th, with another on January 13th, and my complete resignation on January 15th.  I ended up buying a bathmat.  I don't know if I will ever try this one again.

   My favorite quilt would have to be the disappearing hourglass in black and white.  I started it on June 3rd and finished it on July 29th.  It's a nice size quilt and I love the pattern the blocks make.  This is a link to pictures of the finish.

   There were so many projects and I had fun with all of them.  I'm working on my updated crafting to do list for next year and I'm looking forward to lots of  projects in 2016.


Friday, December 25, 2015

She Who Sews Panel Quilt Project

     I'm working on another quilt top using two panels of She Who Sews (by Janet Wecker Frisch).  I received a partial panel in a Christmas swap last year and I bought another panel because some of the blocks are really cool and I'm only going to use the ones I like.  I'm supplementing the panel blocks with trimmed up leftover disappearing hourglass blocks that I made last summer and some yellow polka dot cotton.

   Here's a sneak peek at the fun:


Merry Christmas And Happy New Year!!

   I want to wish everyone a Merry Christmas and a Happy, Healthy New Year!


Monday, December 21, 2015

Granny Square Dishcloths Made With Cotton Yarn


       I had a bunch of cotton yarn in my stash (Peaches and Creme Yarn) and it was time for new dishcloths.   Instead of small squares of closely crocheted stitches, I made eight traditional granny squares with lots of open spaces.  I make them with with 6 rounds of crochet and a size G hook.  They are easy to make (each square takes about 45 minutes), very absorbent, good for scrubbing, and last a long time.  You do have to wring them out really well after using and let them dry or they will get mildewed because the cotton yarn hangs onto moisture.


Saturday, December 19, 2015

Faux Redwork Free Motion Free For All

   I had fun doing free motion with my Janome 7700 today.  I figured out what my problem was the last time I tried to do free motion with this machine.  Once I got going I had a free motion free for all.  I tried to make the quilting pretty and neat, but I couldn't.  I was having too much fun with the free motion.

   I outlined all the redwork pieces very simply and I went a little crazy on the four patch blocks.  I started with hearts then I started making uneven figure eights, squares, crazy looking bows, loops, zig zags, spirals, spiky leaves, long loops, scribbles, loops, thread spools, buttons, and something I wanted to look like scissors.

   The binding is a white fabric with little tiny hearts on it.

  So this is this quilt is done.  Not one I would give as a gift, but it's perfect for my room, my cats or even my dog.


Friday, December 18, 2015

Mini Doily Earrings

    I crocheted these beautiful doily earrings in less than an hour.  I found this free doily earring pattern on Ravelry.  You have to be a member (it's free to join) on Ravelry to get the pattern.  The pattern was written by Emily Forrest and it's a fun pattern for a miniature doily to put on your ear wires.  I used #10 crochet thread in white and a 1.5 mm steel crochet hook.  These were fun to make and I can't wait to wear them.  I would love to make some more and tea dye the doily to make it a more natural color.  Fun.


    I wet block* these mini doilies after I finished them.  They dried overnight and were ready to wear the next day.

   I have the faux redwork quilt top sandwiched and ready to quilt.  I bought a Hobbs Heirloom 80/20 crib size (45" x 60') batt and it was the perfect size to use with this small quilt top. I want to free motion quilt this quilt on my Janome 7700 and the last time I tried to free motion quilt on this machine it was not working for me, so I'm determined to figure this machine out and get this quilt done the way I want.   We'll see.

*To wet block my doilies I wet the doily in cold water, gently squeeze out water, 
place in towel and gently squeeze some more to try to get as much moisture
 out as possible.  Place the doily on a dry towel and gently stretch it, pat it, and shape 
it until it looks even on all sides.  For these little mini doilies, I tried to make sure 
all my loops on the edges were pulled out and visible. Leave it to dry.  
I don't use any starch because I'm afraid of bugs.
I learned this method from lacycrochet blog.   The link to her page is here.


Tuesday, December 15, 2015

Button And Cat Charm Earrings

    I finally made some earrings with the lever back ear wires I found at Fire Mountain when I bought my elastic cord for the elastic button bracelets.  For this project I also had to buy 24 gauge non tarnishing silver wire and I got that from an Etsy seller.  I found the cat charms on eBay a couple of years ago, they still sell them.  They come in a group of 50 and I have a bunch left even thought I've made other jewelry with them and given some away.  The cat charms are Tibetan silver and come from China.  They remind me of Laurel Burch cats without all the colors.  I found the blue and white buttons on Lots of Buttons.com.  I had the small beads and the jump rings in my small jewelry stash.

  To make the button earrings I had to have some on line help.  I used a tutorial from youtube by Potomac Bead Company to get me started.  The link is here.  The cat charms are just attached to the ear wires with gray thread.  So simple.

   These were fun to make, but they took me a couple of hours because I'm not very good at making jewelry and I had to take the button earrings apart several times before I was happy with the finish.

  I have a couple more pair of lever backs that I'm going to pair up with more buttons and I'm also in the process of making some button brooches with felt and pin backs.


2016 - The Year Of The Christmas Tree Wall Hanging

       I just went through pinterest and found nine applique designs for Christmas tree wall hangings that I want to make to decorate my home next Christmas.

     I don't put up a Christmas tree anymore.  I love Christmas trees, the lights and the decorations, but ever since I got the cats 10 years ago I gave up Christmas trees.  I never wanted to find out just what they would do to one.

  So next year I will spend some time making small wall hangings featuring appliqued Christmas trees.  I'll be shopping for lots different shades of green fabric, some red fabric for bindings and decorations, muslin for background and backing, small beads, sequins, and maybe some green yarn because I have an idea for a tree that involves crochet.


Monday, December 14, 2015

Easy Paper Ornaments

   I just found this tutorial about an hour and a half ago while I was surfing the net.  Here is the link.

    I pulled out my small supply of scrap booking paper, my buttons, my stash of tiny glass beads, my floral wire and proceeded to make two of these in less than an hour.  They were fun to make.  I substituted buttons for the big beads in the tutorial.  I don't have a supply of big beads.  The buttons worked fine.  If I were going to make these to give as gifts I would definitely use Christmas papers and get some big beads to give them lots of bling.  These are done in my favorite colors of pink and green.  These would also be fun in some one's school colors.


My Favorite Wonky Christmas Tree Wall Hanging

   This was one of the first raw edge applique projects I ever did.  I hand drew the Christmas tree pattern (love the wonky branches) and cut the trees out from three different fabrics.  Each tree has a bunch of little colored beads on it.  I wanted sequins but could not find any so I settled for beads.  I made this originally to hang on my front door for the Christmas season.  It has been replaced on the front door with a cardinal decoration and the trees now hang on the inside of the door.


My First Proper Round Doily

   I used the videos by Crochet Jewel on Youtube, link here.  This was an easy project and it came out so pretty.  I love doilies.


Sunday, December 13, 2015

Project Bag for Crochet Thread Projects

    I needed a project bag to keep my thread and my doily project safe from kitty claws.  All I had available were large grocery tote bags, so I went on the internet and found a tutorial for a drawstring bag which turned out to be perfect.  You can make this bag as big or as small as you want.  This is the link to make it-love it tutorial.

   I did make my bag a little different.  I made my bag a couple of inches bigger all around, I did french seams so there are no exposed seams inside, I made my drawstrings out of 1 1/2" cotton strips folded and sewed, and I left my drawstrings free since I won't be wearing mine.

    I love it, and I love the fabric I used.  I forgot I even had this fabric.  The instructions in the tutorial were great and this was a really easy project.  I know I'll get a lot of use out of this bag and my doily projects will be safe.


Saturday, December 12, 2015

Crochet, Crochet Thread, And A Doily Video Tutorial

   I think I love youtube.  I was browsing through youtube the other day and I found a tutorial on how to crochet a doily from start to finish.  I found this last week when I was making my braided ear warmers.

   I love crochet but I have never actually crocheted a doily because the instructions just seemed so complicated, but I think I can follow along with a video to get this done.

    Here is the link to the first part of the doily instruction video (there are three parts), the other two parts will show up on the right hand side of your screen for you to click when you are ready for them.

    I have a set of steel crochet hooks and I'll be using a size 1.65 mm hook to make the doily and I bought some crochet thread for this project.  I bought two 1,000 yard skeins of Aunt Lydia's Classic Crochet Thread Size 10 from Amazon.  Each skein was $6.40.

   Before I start the doily project I wanted to get used to using a small hook again so I started a granny square using the thread and a 2.25 mm hook.  I enjoy crocheting granny squares and this will make a nice doily when I get it to a decent size.


Thursday, December 10, 2015

Packaging That I Can Recycle To Hold Needles and Pins

   I've been trying to find a decent container for my used sewing machine needles and bent pins.  I had a pill bottle that I filled up over the last four years which I disposed of last month.  I currently have two pill bottles that I prepared and are ready to fill with old needles and bent pins.  Today I found some packaging that would work really well for this job.

   Burt's Bees makes a tinted lip balm that comes in a plastic blister package.  The blister package holds a cardboard tube that then holds the separate plastic tube of lip balm.  I bought the lip balm because I wanted to try it.  I had no idea that the packaging would be this cool.  The cardboard tube is closed on both ends and is the perfect size to store old needles and pins or you can even use it for your traveling sewing kit.

  The lip balm was $6.62 at the store.

   Here's a picture of the tube.


Tuesday, December 8, 2015

Modifications To Simplify

    I had to modify the braided ear warmer pattern to simplify it for me.  I just couldn't handle some of the fussy parts the designer wrote into her original pattern.  I love the strands of half double crochet so I kept those.  I ended up making 5 strands of the half double crochet, braiding them and joining the two ends with slip stitches.  It worked great.  I had the measurement from my original braided ear warmer and I now know how long each strand has to be to fit my head because the original stitch count in the instructions did not work for this yarn and I had to modify it to make it longer.

   I used a skein of Knitpicks Chroma Worsted in Mid Winter colorway.  I've had this yarn since 2011 (the colorway name has changed to Hollyhock, yuck) and I think this project was perfect for it.

   Here is my newest braided ear warmer.  Easier for me to make and just as cute. Just to let you know I did try to take a picture of me wearing this but it turned out really bad.  I think my head model does a nice job.


Sunday, December 6, 2015

Secret Santa Revealed

   Today was opening day for our secret santa packages on the Quilting Board.  Wow, I can't believe all the goodies I got.  It is definitely a Quilty Chritmas day today.

  Here's a list and a couple of pix:

three beautiful postcards showing the area where my secret santa lives
a pack of Vine in Frienship stickers that have a design that look like birds using the drunkards path pieces,
a magazine "Yukon, North of Ordinary" the official inflight magazine of Air North with lots of interesting information about Yukon and the people that live there, can't wait to read this,
a snowman tin,
a half yard of beautiful fabric with sewing notions on it,
jingle bells, to add to my collection,
a beautiful J. Wecker Frisch panel, Sewing Seeds,
a tin of Snow Now, Snow in an Instant, just add water to the snow powder,
a fat quarter of fabric with thread spools on it in orange, yellow, and red,
a magnet with art on it from a Yukon artist, Jim Robb, Secret Santa says the artist dated her Mom back in the day, cute, the name of the art work is Gold Mine in the Sky,
a fabric basket made by secret santa with sewing notions fabrics, love it,
a note pad with cover art by Lynn Blake, the art is called "Small Town Days" and secret santa told me she used to be a daycare teacher at her niece's school before she left to pursue art full time,
Filigriee Fat Quarter Sampler containing 15 fat quarters,
Literary Fat Quarter sampler containing 10 fat quarters,
a package of Insul-Bright for potholders (not pictured),
and last but not least, 1 yard of fabric called "My Hometown" by Cat Williams with quilts pictured on it,


   This swap was awesome this year.  


A Sunday Crochet Project

  I was cruising on Ravelry the other day and found a crocheted braided ear warmer pattern that I just had to have.  I didn't want to steal any of the designer's pictures from the Ravelry site, so I'm including a link to the designer's etsy store with the pattern:  V. Larios' Etsy Store - Braided Ear Warmer Pattern so you can see the pattern for yourself.

   To make this pattern I bought a skein of Big Twist Value Yarn from Joann Fabrics today.  I've never seen the brand Big Twist Value before.  The package says it's made in India and is distributed by Jo-Ann stores.  I don't know if this brand makes anything other than acrylic yarn, the yarn I bought is acrylic.  I bought the yarn in colorway dark rose.


    This took me about 3 1/2 hours to complete.  The instructions were okay, but they could have been better when it came to finishing.  They were a little hard to follow.  I did finish it the way it was written, but the piece is a little too big for my head.  I would like a tighter fit, so I'm going to modify the area where the braids are joined.  

    I only used about half of this skein of yarn, so I have enough left over to make another.

    It turned out super cute and it's really warm.  I'm going to love this.  I may even make a few more  in different colors. 


Saturday, December 5, 2015

Evening Sewing


      Tonight I made some more hanging dishtowels for me and dear daughter.  I resisted the temptation to use Christmas fabric on these.  Instead I wanted to make something we could use all winter long.  The green fabric has tiny metallic embellishments on it.  I think these will be pretty enough to give those dark winter days a little lift.


    The fabric cost me about $3.00 (I only needed 10" x WOF), I bought two regular size dishtowels at Tuesday Morning for $4.99 and the buttons were $.20 each.  So I made four hanging dishtowels for less than $10.00.  They took me about  2  1/2 hours to make from start to finish.

A Little Featherweight Maintenance

   I read a lot of posts on the Quilting Board about vintage machines and I learned about the vintage sewing machine bed cushions from the folks that refurbish vintage machines.  

    This morning I replaced the bed cushions on the bottom of my new Singer featherweight.  Two of the cushions was flattened on one side and all of them were very dry.  I also replaced the screws because I wasn't sure what condition the old screws would be in.  The old screws are in good condition. I'll keep them in my featherweight tool box for spares.  The machine will sit better on the table and the cushions will absorb some of the vibration from the motor.  This was an easy inexpensive fix.  

    I bought the new bed cushions and screws from april1930s.com.  She specializes in vintage Singer machine parts.  

   The new bed cushions and screws are on top.


Tuesday, December 1, 2015

Faux Redwork Quilt Top Finished

     I finished sewing the blocks together this morning.  It didn't take long to put the rows together.  There were 30 blocks all together and it makes a smallish lap quilt.  I love the faux redwork blocks and the simple four patches are perfect with them.  I tried to alternate the birds and the flower redwork blocks in each row.  It's hard to see the polka dots in my pictures because I when I re-sized the pictures the polka dots disappeared.


    I have to order a batt to make this into a quilt.  I think I have enough of the red polka dot fabric to make the back, I'm not sure about the binding.  I'll keep working on this until it is done.

  CORRECTION TO PREVIOUS POST:

    I have to make a correction to my description of the Singer One sewing machine I posted about yesterday.  It does have a drop feed dog switch.  I missed the instruction in the book, it was a short paragraph on a page I skipped and the switch is kind of hidden on the back under the slide out table  I was wrong, you can do free motion darning and quilting with the Singer One sewing machine.

Monday, November 30, 2015

Singer One Sewing Machine

    I couldn't resist picking up the Singer One machine that I was crowing about in my post of November 22, 2015.    I ordered it the same day I found it on line.  I wished I had taken the time to shop around before I paid $249.00 with free shipping at Joann Fabrics.  I could have saved more money if I had purchased it from Amazon the same day for $179.00 with free Prime shipping.  On the plus side shipping from Joann Fabrics was pretty quick, they shipped it be Fed Ex and I had it by Friday, the 27th.  By the way, the price today is $209.00 at Joann Fabrics and Amazon.

      There are two models of the Singer One, I bought the cheaper model that only has 24 stitches because I have three other machines with lots of decorative stitches, so I felt like I didn't need to spend more for stitches I already had.  

     This will make a great back up machine for me and I think it will do well with projects that have thicker layers.  My Janome Horizon 7700 does not do well with thick layers of fabric, it stalls and stammers unless I have the walking foot or the dual feed foot on and I don't always have those feet on the machine when I need them.  I now have two computerized Singer sewing machines and I will be depending on them to do a lot of my craft sewing with thicker layers.


   This machine is bigger than I thought it was from the pictures, it's heavy, but not too heavy to lift, and it has a nice big work surface.  There is a built in handle that folds down.  The table that slides on to the free arm on the left slides off with the touch of a button so you can sew with the free arm.  There is also an accessory box that slides out from that table so you don't have to remove the entire table to get to the accessory box where you store your bobbins and presser feet.  It has a reverse sewing button on the front of the machine and it makes 24 stitches (6 essential, 4 stretch, 12 decorative, and 2 fully automatic 1-step buttonholes).  

    The machine comes with a comprehensive manual, a instructional DVD, 4 empty bobbins, an all purpose presser foot, a blind hem foot, a satin stitch foot, a zipper foot, a buttonhole foot, a little brush for cleaning the bobbin and hook area, an extra spool pin, a small key size screwdriver for removing the needle plate, and a variety pack of machine needles.  I ordered some additional bobbins for this machine, because I like to have more than 4.  There are lots of options for stitch length and width and it's easy to adjust with the plus and minus buttons near the LED display.   It does twin needle sewing and you can adjust the needle position when sewing straight stitch to 13 different positions using the stitch width control.

    The feed dogs on this machine do not drop for free motion quilting or darning.  This machine does not have an up/down needle button.

   I wound a bobbin this morning and gave it a test run.  It was a cinch to thread and the tension was perfect right out of the box.  While I was sewing up the sample below I couldn't hear the television, so it does run loud, but it sews great and you can sew pretty fast with it.  Here's a sample of the stitching front and back.  It was easy to switch stitches just by pressing a button.

 
    Front:


   Back:


      I think this would make a great beginner sewing machine.  The manual is easy to read, it explains all the parts of the machine, how to wind a bobbin, how to thread the machine, and it has a needle/thread/fabric chart.  The manual also covers how to make buttonholes, how to use the machine to sew on a button, how to insert a zipper, how to use the blind hem stitch, when to use stretch stitches, how to care for the machine, troubleshooting tips, and even what size bobbins to buy.  This manual is well written and should help keep a beginner from becoming frustrated with this machine.

  I'm really happy I bought this machine.  I think I am going to do a lot of fun sewing with it.


Saturday, November 28, 2015

My Vintage Singer Sewing Machine Is Here

Meet Katie, my 1951 Singer Model 221.


She arrived yesterday and I didn't have time to unpack her until today.  I wanted to unpack her carefully.  The seller had double boxed the machine at my request and there were plenty of packing peanuts.  She is in really nice condition.  I had the chance to thread her tonight and hit the gas.  She sews a pretty stitch, the top and bottom are perfectly balanced.

Top


Bottom


Katie will be set up and stay on my sewing table.  I hope we have many happy hours stitching together.  

Thursday, November 26, 2015

Happy Thanksgiving!

    Hope everyone has a wonderful Thanksgiving day.


    I do have one more project to share that I made last night because I couldn't wait to try the elastic cord I bought to make button bracelets.  I made these two bracelets while watching television last night.


    I love the little pretty painted wooden buttons and I have a ton of them, but they don't make the best bracelets because it's hard to keep the painted face showing when you are putting it on and wearing it, and the other side is just plain wood.  I did manage to get all the buttons face up for this picture.  I'm hoping I'll have better luck using the painted wooden buttons as dangle earrings.


Wednesday, November 25, 2015

I Keep A Sewing Machine Inventory

      Since I have more than one sewing machine and they change periodically, I decided to keep a sewing machine inventory for my daughter's use when I pass away.

    I know she will probably want to sell some of my sewing machines when I die and I don't want her to be one of those people that says, "I have this sewing machine for sale, but I don't know if it works or what it does."  She can just look at my inventory to see when the machine was bought, how much I paid for it, the serial number of the machine, a description of the kind of sewing you can do with the machine, all the presser feet that go with that machine, and whether there is an owner's manual.  Knowing how much I originally paid for it will definitely help her set a price.

   I've let her sew on three of the machines, so she knows how to use them and will know that they work, if and when she tries to sell them.

   I keep this list up to date with each machine purchased or discarded.

The Next Quilt Project

   I found this faux redwork panel on etsy a few weeks ago.  Each block is about 7.25" square.

This,


   plus this,


plus 30 - 5" white charm squares, equal this,


   I love, love, love the red mini polka dot fabric.  I pre-washed all the fabric so I shouldn't have a lot of problem with the dye bleeding.  This quilt top should be a lot of fun to make.  


Tuesday, November 24, 2015

My V.I.P. Bear, Henderson

   Meet my new friend, Henderson.  He is a pre-printed panel bear that I found on etsy or ebay a couple of years ago.  The title on the instructions call him "The V.I.P. Bear."  The panel has all the pre-printed pieces, you cut them out and follow the directions.  I love to make teddy bears. I have a pattern for a 16" bear that I make with mohair fake fur fat quarters, but I couldn't resist this fella when I saw him for sale.


    I fashioned his vest from a sewing tutorial I found on youtube.  All I needed was the shape and I had a vest.

Monday, November 23, 2015

Researching Button Crafts and Jewelry

     While I was making my hanging dishtowels last week I had the chance to explore my button stash and I realized that I need to start using those buttons I bought last year.  I've been researching button bracelets, earrings, and brooches.  I found a few different ways to make each item, some are more complex than others.  I like to use the easier methods for making each one.  I found the following websites with items that I like, some are video tutorials or picture tutorials.  

  Button bracelets:

    Youtube video tutorial making a stretch button bracelet

    Chain Button Bracelet tutorial

    Button bracelet on cord

  Button and fabric brooches:

   Fabric flower brooch

   Video tutorial fabric brooch

   Fabric brooch (no tutorial).  These are pretty cool and I think I could cut out 6 or 7 layers of petals to get a similar look.

 Button earrings:

    Youtube video to make button earrings

   Making jewelry with buttons is fun, but I love the combination of fabric and buttons since I have a nice supply of both.

   To make my button and fabric jewelry I had to get some other materials.  I ordered some elastic cord for bracelets, leverbacks for earrings, and some pin backs for brooches.  I've got my buttons out and I'm sorting them into groups for each item I want to make while I wait for the other materials to finish them.  


Sunday, November 22, 2015

I Love This Fun Sewing Machine - Window Shopping

      While I was shopping for my vintage Singer Model 221, I saw this cute little machine.  So sweet.  I've heard a lot of people say that they wouldn't buy a new Singer sewing machine because they are worthless, but this machine has a really sweet shape (kind of like the Model 221) and I could totally see myself using this for a lot of craft sewing.

    This is a Singer One, it has 24 stitches including buttonholes and 4 stretch stitches.  It comes with an all purpose presser foot, blind hem foot, satin stitch foot, zipper foot and buttonhole foot.  The base on the left side slides off for free arm sewing and there is also an accessory storage box there. It's so adorable and it's on sale all over the internet.

    The best deals I saw were on Amazon and Walmart.  Amazon had it for $179.00 with free Prime shipping  and Walmart had it for $179.00 at Walmart with free shipping or free site to store pickup.  Overstock advertises it at $179.00 as well but they are out of stock.


    There is also a Singer One Plus that is a little more expensive because it has loads of features like the needle up and down and 231 stitches.  The Singer One Plus is also on sale all over the internet.


My Christmas Present From Me To Me

   I finally found a Singer Model 221, commonly called a Featherweight, on ebay with a price I could afford.  I have been shopping on line for a Featherweight for a while now.  I've had a hard time finding a decent machine for a good price.  I've spent a lot of time reading seller's descriptions of Featherweights for sale.  I found a lot of sellers that have this type of machine for sale, they know that this machine is sought after, they price them high, but they can't even tell you whether the machine works because they don't know anything about them.  I wanted to buy one that was being thinned from the herd of a collector or to get one where the seller took the time to have the machine serviced, could tell me it worked and wasn't overpriced.  

   I had to go on line to find my machine because there is no market for vintage sewing machines in my area.  I've been checking my local Craigslist and I even checked with a sewing machine repair guy in town to see if he had any vintage machines but he only had one, it was a Singer 404 without any extras.  I didn't want it.

   So this is the machine I bought from the ebay seller.  It was made in 1949 and has the striated face plate.  I love how shiny the presser feet are because lots of times they are kind of rusty and need cleaning, there is also an owner's manual, a buttonholer, and a cool screwdriver.  The seller said they recently had it serviced and oiled, and that it runs well.  I requested that the seller double box the machine for shipping which they agreed to.


    I ordered some extra bobbins and a 1/4" patchwork foot for the machine.  I will use it for piecing quilts and simple projects.  This machine will be kept set up on my sewing table.  Estimated delivery of the machine is December 2.