Pages

Saturday, May 2, 2015

Bead/Sewing Cat Picture Project


  I found this pretty picture on the internet.  This is an art drawing by Laurel Burch.  It's called "Flowering Felines."

   Ms. Burch drew colorful pictures of cats, dogs, horses, sea life and plant life.  Unfortunately, Ms. Burch passed away several years ago.  I found her work after I bought my bengal kittens, Taffy Morgana and Merlin almost 10 years ago.  I was all into cat everything and I knew I had to have some Laurel Burch cat stuff.  I bought a few pieces of jewelry, two pair of socks and three bags, but I never had anything by her to hang on my wall.  This picture is going on my wall with a few enhancements.

   Here are the two pair of enamel earrings that I cherish.


   Back to the picture.  After looking at Flowering Felines for a while I decided that beads were the way to go.  I wanted this picture to shimmer when the light hit it.  I printed the picture onto a fabric sheet made for my ink jet printer.  I used Avery 3384, 8 1/2" x 11" printable fabric sheets.  It worked very well in my HP ink jet printer and it printed right the first time.  When you use this type of product you have to make sure you put the fabric sheet in paper tray right so the picture prints on the fabric side.  The other side is glossy and has the adhesive to make the sheet an iron on.  I did a quick print test to make sure I put the fabric sheet in the paper tray the right way.  I mark a piece of paper indicating which way the paper was set in the paper tray so after I print I can figure out which way my fabric sheet should go in.  It only takes a minute to do and is worth the trouble to get the picture printed right on the fabric sheet.

    After printing my picture, I ironed it to a piece of muslin to stabilize it before I started adding beads.   The piece was stiff and I could not put it in an embroidery hoop.  I also had a hard time finding the exact spots I wanted to put my beads from the back side of the work, but I used a flashlight to pin point the exact spot I wanted to put my needle in from the back and that helped a lot.

     I did all the beads in the cats first, then I added the orange borders and finished beading the dots outside of the cats.  By the way, I thought sewing the orange borders on through the fabric sheet would leave an adhesive residue on my sewing machine needle, but it did not and it was really easy to sew through.  That was a nice surprise.  I used gold metallic embroidery thread to put the beads on and it was a real pain to work with.  I had a hard time separating my threads and keeping them from shredding while I sewed, but I wanted shimmer and I thought cotton embroidery thread would dull the shine of the beads.  I used multi colored 6/0 glass beads by Craft Designer that I found at Joann's Fabrics.

   The beading was done and it was time to frame this.  I bought the frame at Walmart for $5.00.  It was a 10" x 13" floating frame and the black part of the frame is actually clips that secure the piece to the glass.  Super easy.
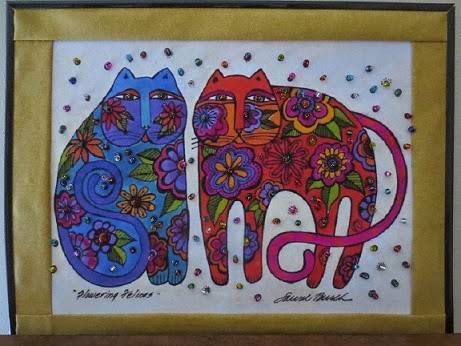

Up close of the  beads.


   Cost for my picture was about $15.75.

   Done.

Wednesday, April 29, 2015

Blue Wallhanging

   I bought this kit from an ebay seller last year.  The pattern for the table runner was actually stars made with a 9 patch and the points were supposed to be made with half square triangles.  Unfortunately, all the pieces for the pattern were all pre-cut and they cut all the squares the same size which did not work for half square triangles making the points of the stars.  The half square triangles came out too small.  So I changed the pattern and just ran the white gold fabric around the nine patches I started.

    I made this to hang on the wall in my living room.  My favorite part of this project is the quilting.  I did something I haven't done before which was pretty easy for a small project.  I drew a simple flower pattern on tissue paper.  One thing I can draw is a simple flower.  The flower is the size the block that makes up the runner, there are three of them, each block is separated by sashing,  I pinned the tissue paper where I wanted it and free motion quilted the flower in each block.  I had a good time doing it and it came out pretty good.

   I quilted the sashing and the borders with a wavy vine and some pointy leaves on each end.  Easy to do and worked great.


   My quilting buddy, Taffy Morgana, loves it.  She said, "Nice work, Mom!"


Monday, April 27, 2015

Mini Snail Trail Blocks On My Mini Quilt Hanger


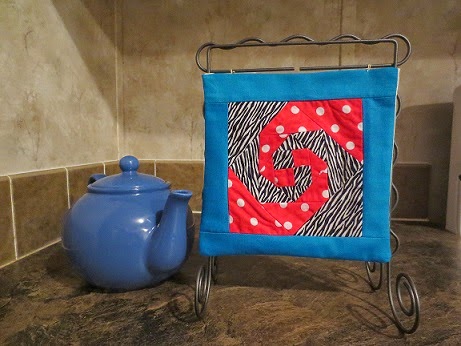
  I almost forgot to post a picture of the minis on the mini quilt hanger.  I put a border on the mini snail trail blocks then I sewed them both together without batting.  This is the second set of mini snail trail blocks I made.  I tried to quilt the first set together and it didn't work at all, so I kept these unquilted.


Sunday, April 26, 2015

Beaded Stilettos

      I finally found my turkey lacer skewers at Bed Bath and Beyond yesterday while I was out and about.  We have a Michaels store in the same shopping center so I thought I could find some beads there.  They must be in the process of re-organizing or deleting their bead section because it was gone except for a few packages on the end of the aisle.  I didn't like what was out so I went to JoAnn's this morning and found beads.

    Here are the beaded stilettos I made for myself.


   I'd like to make more of these using a better glue and a longer skewer.  I used Aleenes Metal and Jewelry glue, which is like a super glue.  These skewers were kind of short and when you put big beads on them you don't have a lot of skewer left.

   Just in case you are wondering, my friend contacted me about the Singer 401A sewing machine and she wants it back.  We just have to find a day and time to meet halfway and I'll give it back to her.  

Saturday, April 25, 2015

Saying Goodbye to Elsie, the Singer 401A

   I received Elsie from a friend about 4 years ago who asked if I wanted it and I immediately said yes.  I love vintage sewing machines.  This machine has a lovely history.  My friend's mother bought it new in 1959 with inheritance money from her father's estate.  She made dresses for her four daughters with it and my friend learned to sew on it and made her own clothes until she graduated High School.


   While we were loading the machine into my car, my friend say that I should never sell it.  If I ever wanted to get rid of it, I should contact her so she could take it back.  I agreed.  

    At the time my friend gave Elsie (I named her after my friend's mother) to me, she was moving in with her daughter and downsizing.  The machine was out of its cabinet, (the cabinet was taken as a piece of furniture by a family member, whereabouts unknown) kind of moldy, missing the power cord, with rusty attachments.  I had the machine serviced, bought a new power cord, and cleaned up the attachments.  But I never really bonded with the machine.  I used it about 3 times.  I think the reason I never bonded with the machine is because it was never completely mine.  It always belonged to my friend.

   So I emailed my friend today and told her I needed to get rid of this machine for space and I would gladly meet her halfway (about 100 miles) and give it back to her.  I haven't had a response to my email yet.


Sunday, April 19, 2015

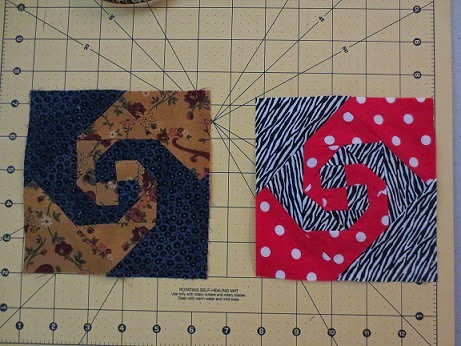
Mini Snail Trail Blocks

I finally made some mini snail trail blocks for my mini quilt stand.


Beginning


Finish