Pages

Showing posts with label fix. Show all posts

Tuesday, January 19, 2016

Sandwiched Quilt Ready To Be Quilted And Re-Making A Quilt


   I have my She Who Sews quilt sandwiched and ready to straight line quilt.  The machine is set up and I meant to start on it today but I got sidetracked with my next project.

   Yesterday I had lunch with Dear Daughter and we did some shopping.  She gave me a string quilt made from polyester fabrics that her grandmother made for her half brother when he was born.  I was supposed to mend the tears in it.  Dear Daughter's half brother was born in 2000 and her almost 90 year old grandmother finished this in 2003.  Dear Daughter remembers that her grandmother was having a hard time making herself finish this quilt.

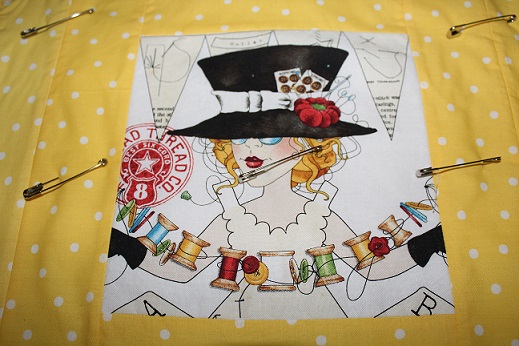
   Dear Daughter and I assessed her half brother's quilt yesterday and realized that it did not have any batting in it, the binding was made by folding the backing to the front and sewing it on with the machine, it was kind of messy, and it was not very well quilted.  So we decided that I would take the quilt apart, mend the tears, add a batting, a new backing, do some straight line quilting on it and do a proper binding job on it.  The quilt measures about 56" x 56".  So my mending job has turned into re-making a quilt.  Dear Daughter and I went to Joann Fabrics to get backing/binding fabric and a nice new batting.  I spent the day today taking the binding/backing off the quilt and pinning up all the blocks that need mending.  I wanted to get a sense of how much needed to be mended.  Now that I have it ready to be mended I can get back to my She Who Sews quilt project.

    Here's a picture of the polyester quilt that I took yesterday before I dismantled it.


Saturday, December 5, 2015

A Little Featherweight Maintenance

   I read a lot of posts on the Quilting Board about vintage machines and I learned about the vintage sewing machine bed cushions from the folks that refurbish vintage machines.  

    This morning I replaced the bed cushions on the bottom of my new Singer featherweight.  Two of the cushions was flattened on one side and all of them were very dry.  I also replaced the screws because I wasn't sure what condition the old screws would be in.  The old screws are in good condition. I'll keep them in my featherweight tool box for spares.  The machine will sit better on the table and the cushions will absorb some of the vibration from the motor.  This was an easy inexpensive fix.  

    I bought the new bed cushions and screws from april1930s.com.  She specializes in vintage Singer machine parts.  

   The new bed cushions and screws are on top.


Wednesday, March 18, 2015

Kitchen Drawer Fix Up and Clean Up Project


    I live in a mobile home.  I love my mobile home.  I bought it new 7 years ago and I love the floor plan.  My kitchen is huge and it opens into the living room and the dining room with a door to the laundry room.  It also has a great pantry (no pictures, it's kind of messy in there now and needs to be cleaned up).  My kitchen has tons of cabinet space but I only have three drawers in the entire kitchen.  It's really sad.  I like drawers and I wish I had a few more.  While I'm wishing for more drawers, it's time to fix and organize my existing drawers.

  View from the dining room looking straight to the laundry room door.


This is the view from the dining room looking at the pantry door.


This is the view from the living room with my homemade curtains on the windows.


    Yes, the counter tops were cleaned off to take these pictures.  The counters are normally covered with all manner of kitchen things, dish soap, hand soap, and hand lotion by the sink; dog food, cat food, and dry cereal under the cabinets by the refrigerator, dish towels hanging on racks set on the cabinet doors, and pot holders by the stove top.


      These drawers were not built for heavy use.  The front of the top drawer I was using for silverware has come off two different times.  In examining the top drawer for problems when I cleaned it out, I realized that the right side slider mechanism of the top drawer was placed lower than the left side slider mechanism.  I unscrewed the bracket and placed the bracket in line with the left side bracket.  I hope this solves my top drawer problem and I can use it without the front coming off.  I was only using this drawer for small items that I never needed so I wouldn't have to open it.


   Bracket fixed.  You can see the hole under the bracket where it was originally placed and it was way too low.


   I have been using the second drawer to store knives, but I have too many in there.  This drawer needed to be cleaned out and I also checked the slider mechanism for this drawer to make sure it was working properly.


     I'm ditching these old, old, old, chef knives [so tired of sharpening them] and I ordered two new chef's knives from Amazon on Monday.


      New chef knives.

 
    This is the bottom drawer and it holds all my large utensils.  I thought the basket would help keep everything under control, but the drawer is clearly too deep.  I weeded out all the unnecessary stuff, cleaned the drawer and put my crazy utensils back in the basket in the drawer.


  Here is the top drawer all cleaned up.


  Here is the knife drawer all cleaned up with my new chef knife set.


   I'm really happy with my drawer fix and clean up.  It was interesting trying to find a good position so I could reach the back board to put that slider mechanism bracket back on.

Friday, February 20, 2015

Here Comes The Machine Parade!

     I'm having a sewing, embroidery and serger machine parade today.  Well, not really a parade.  I'm rearranging some furniture and I wanted to put all my machines in one place to take a group photo but I didn't have a table large enough for all the machines together.  So here they are individually.   All of these machines work and I have used every one of them except the hand crank (the black machine).  That one has not been used on a project yet.  All of my machines have names.  I started naming them when I adopted the Bernina and Singer 401A.  I named them after their former owners.

   I keep a current inventory document with each machine's history on it.  I note the machine make,  model number, the serial number, when I bought or received it, how much I paid, where it came from, when it was last serviced, what each machine does the best and how I use it.  I also note what accessories I purchased for the machine and how much they cost.  I also note whether I have an owner's manual for the machine.  I love owner's manuals, they are the best resource for learning your machine.  I refer to this inventory quite often and I hope my daughter will find the inventory handy if she ever has to downsize the collection.  

Here they are in order of acquisition:

Singer 3400XL- Vesta.  Acquired in 2002.  This machine is great for regular sewing and straight line quilting with a walking foot.  I cannot free motion quilt with it because the feed dogs do not drop.  I know I can cover the feed dogs with an index card but I'm just not comfortable doing that so I got another machine for free motion quilting.  This machine is great for garment sewing and quilting.  I use this sewing machine when I'm inserting zippers and making button holes.  I also use the buttonhole stitch for machine applique.  


Bernina 1530 - Martha.  Given to me in 2010.  This machine is great from free motion quilting, straight line quilting and regular straight sewing.  There are lots of specialty stitches on the machine, but I only use it for piecing,quilting and applique.  I have two patchwork presser feet, a zipper foot, a general purpose foot, a hopping (darning) foot, and a walking foot for this machine.


Singer 401A -  Elsie.  Given to me in 2011.  This vintage machine (manufactured in 1959) came with some cool presser feet.  I have not done a lot with this machine because I don't usually have time to experiment with it, but I love the ruffler foot that came with this machine.  I played with the ruffler foot a little last year and really loved the ruffle created with that foot.


Juki MO644 D - Browyn.  Serger - I bought this serger in 2013.  I wanted a serger to make scarves and finish seams, but I'm not loving this serger.  The stitching is off on it and I have been trying to fix it.  I have to check out some of the youtube videos on tension and see if I can get it working right again.


Singer Model 15 hand crank -  Black Beauty. I bought this from an ebay seller last year.  I've not used this straight stitch machine much except to test it when I first got it.  I just love the look of it and I love the wooden base.  I'm thinking about painting the base.


Brother 770PE - Myrna.  Embroidery Machine.  This is the most recent acquisition.  Given to me as a birthday present last December.  I'm enjoying playing with this machine.  I wish I had more time to play with it.  I will share a recent project with you after it is gifted tomorrow.


    Oh, yeah, and I'm also storing a Domestic (White Sewing Machine Company) Model 801 from the 1970's.  It was inherited by my daughter from her Grandmother.  It sits in a rickety cabinet that needs to be replaced but I tested the machine when it came here a few years ago and it seems to work okay.  It probably could do with a servicing, but with the cabinet it's hard to get that done.  Her name is Carolina (after the former owner).  She does straight and zig zag stitching, button holes, came with a zipper foot, a darning foot, a seam guide, a cording foot, an extra needle plate.  I don't have any pictures of her.